Guage Cluster DIY Guide
I'll start this write-up by pointing out that it is possible to remove the gauge cluster without removing the steering wheel, but it's a real pain. I highly recommend following my steering wheel removal guide first (CLICK HERE), as it makes this job much easier.
As mentioned in steering wheel removal guide, be careful when removing the steering wheel. It's easy to damage the HICAS sensor if you use excessive force. Don't simply yank the wheel off the steering shaft—take your time and remove it properly.
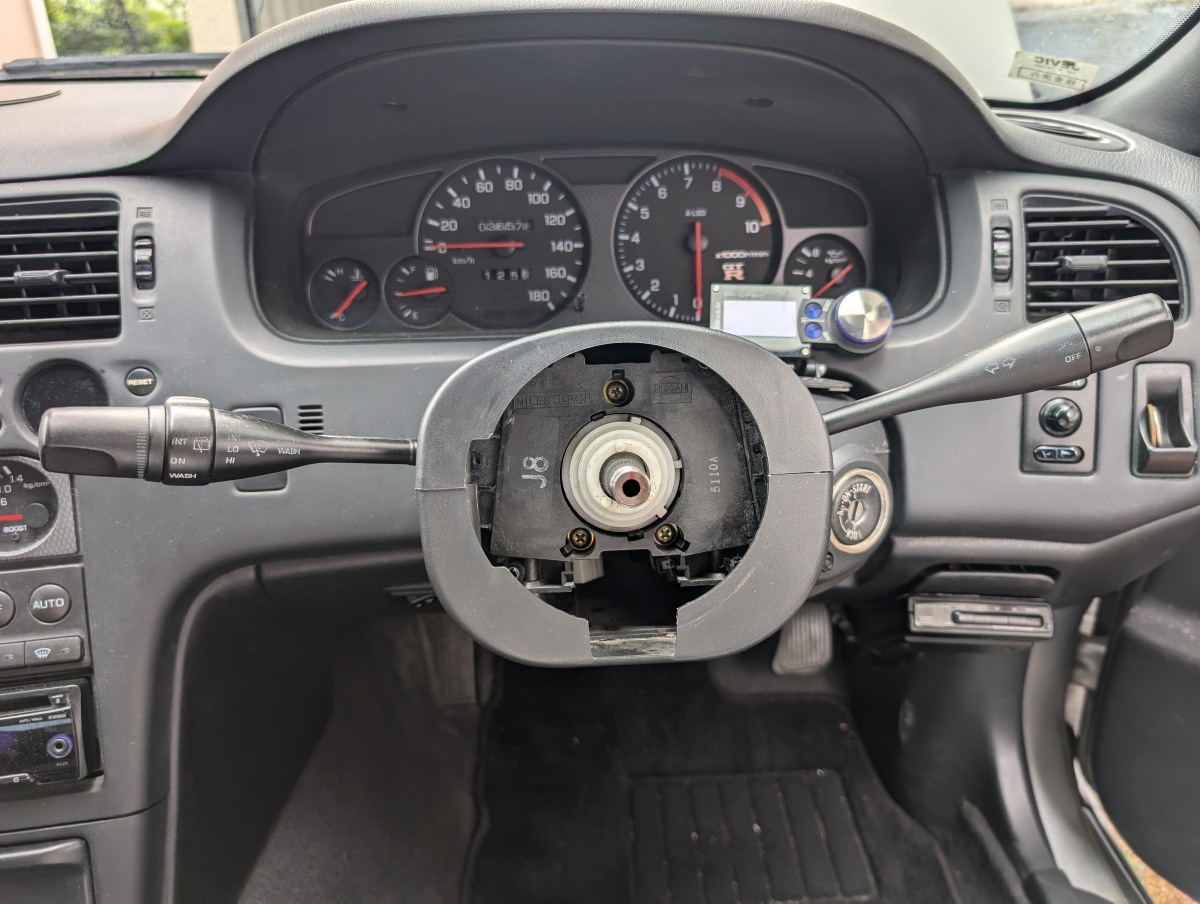
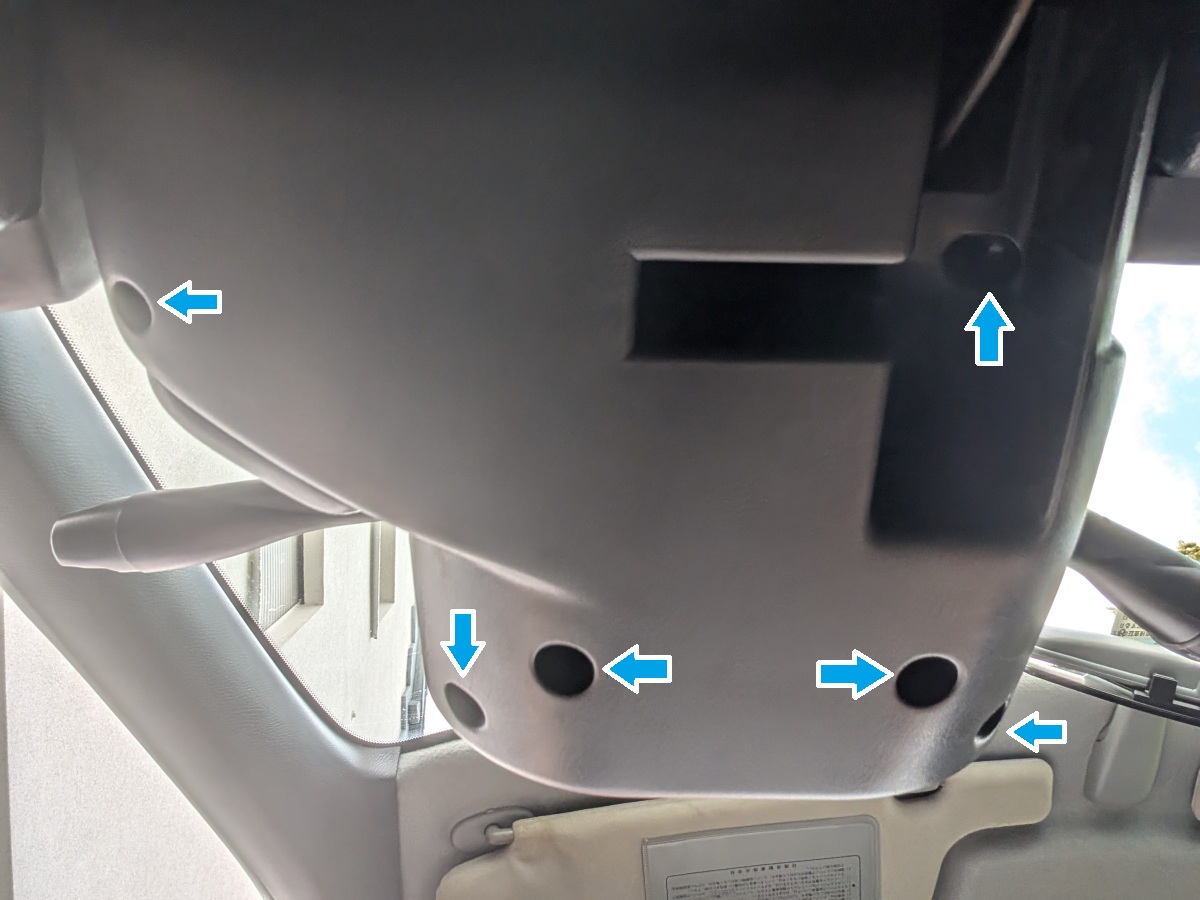
Pull out the steering wheel adjustment lever to access the hidden screw beneath it. Remove this screw along with the other five Phillips-head screws securing the steering column trim. The screws are quite small, so keep them somewhere safe. I used my GT-R's ashtray to keep them from getting lost.
With all the screws removed, begin separating the trim behind the steering wheel. Use a trim removal tool to carefully remove the trim piece surrounding the ignition cylinder. The remaining trim should then separate into two pieces.
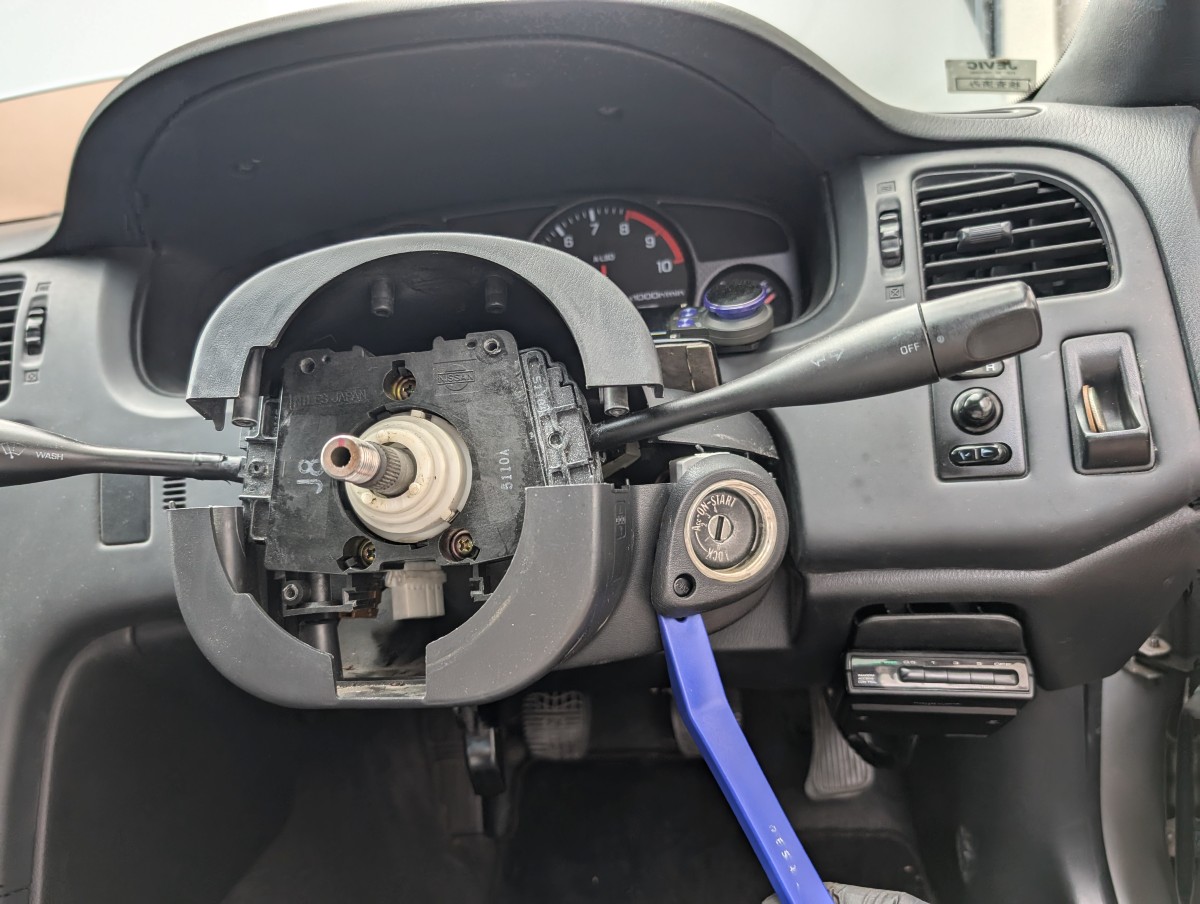
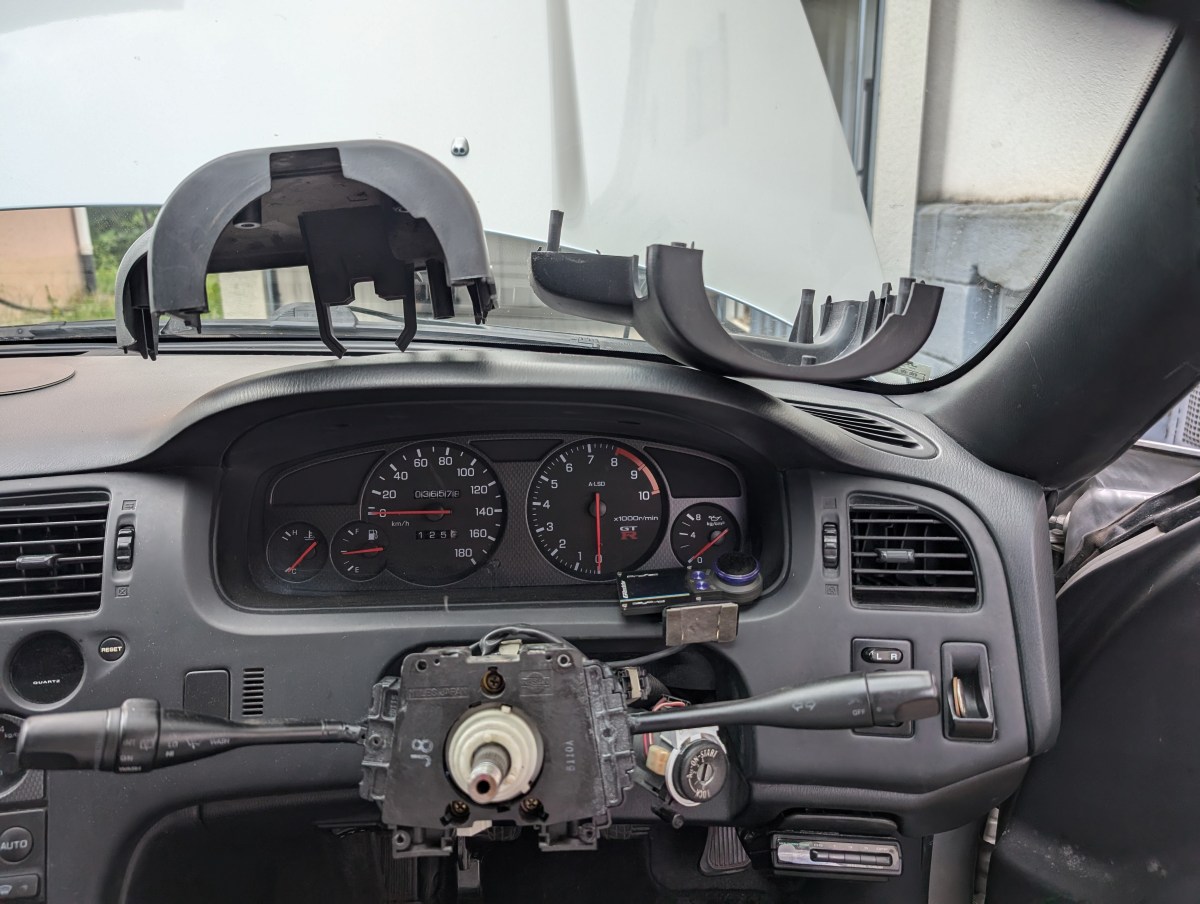
I placed the pieces on top of the dash in the photo so you can see how they fit together. You'll notice a clip that secures one section around the steering column, which makes reinstallation easier if you're working alone.
Next, turn the shift knob counterclockwise and unscrew it completely. Remove the ashtray and cigarette lighter if your car still has one installed. Then remove the screw circled in blue that secures the center dash panel.
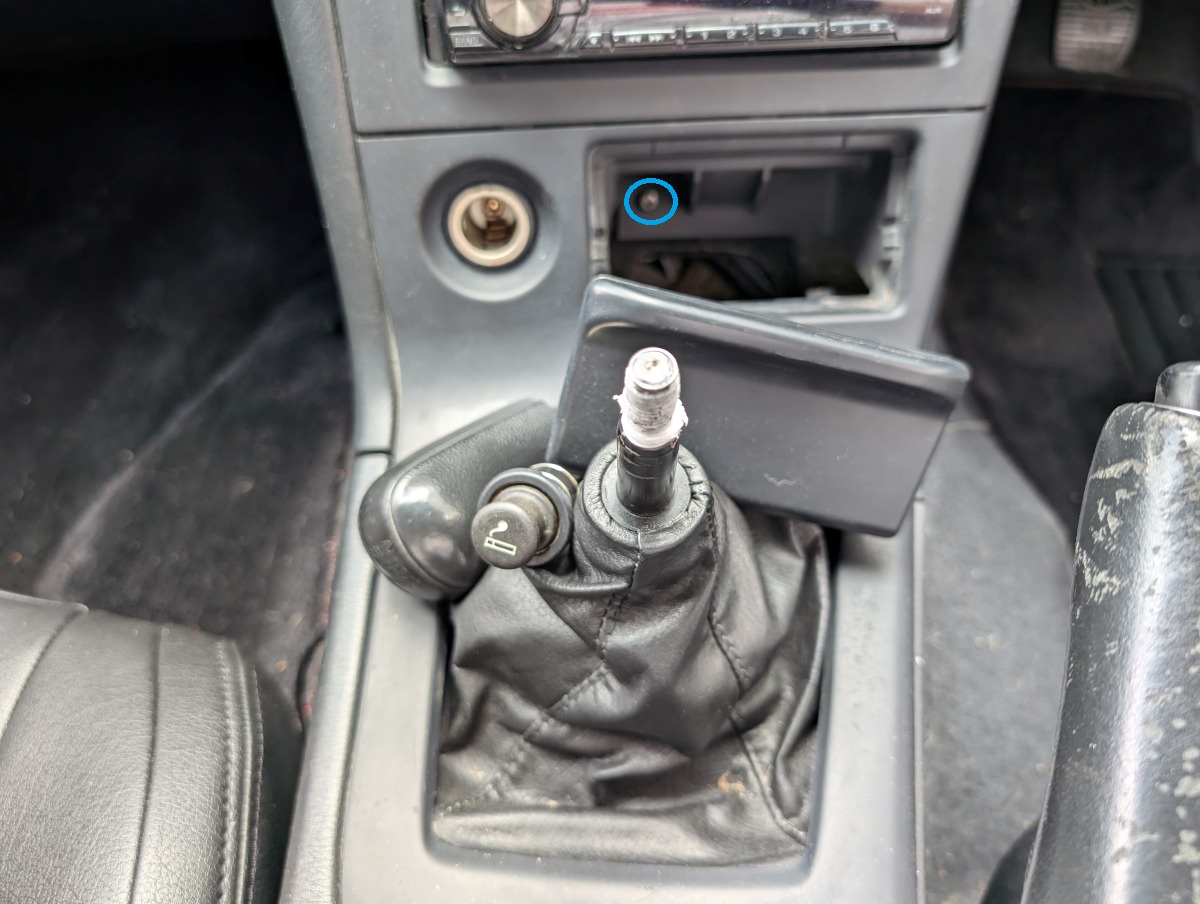
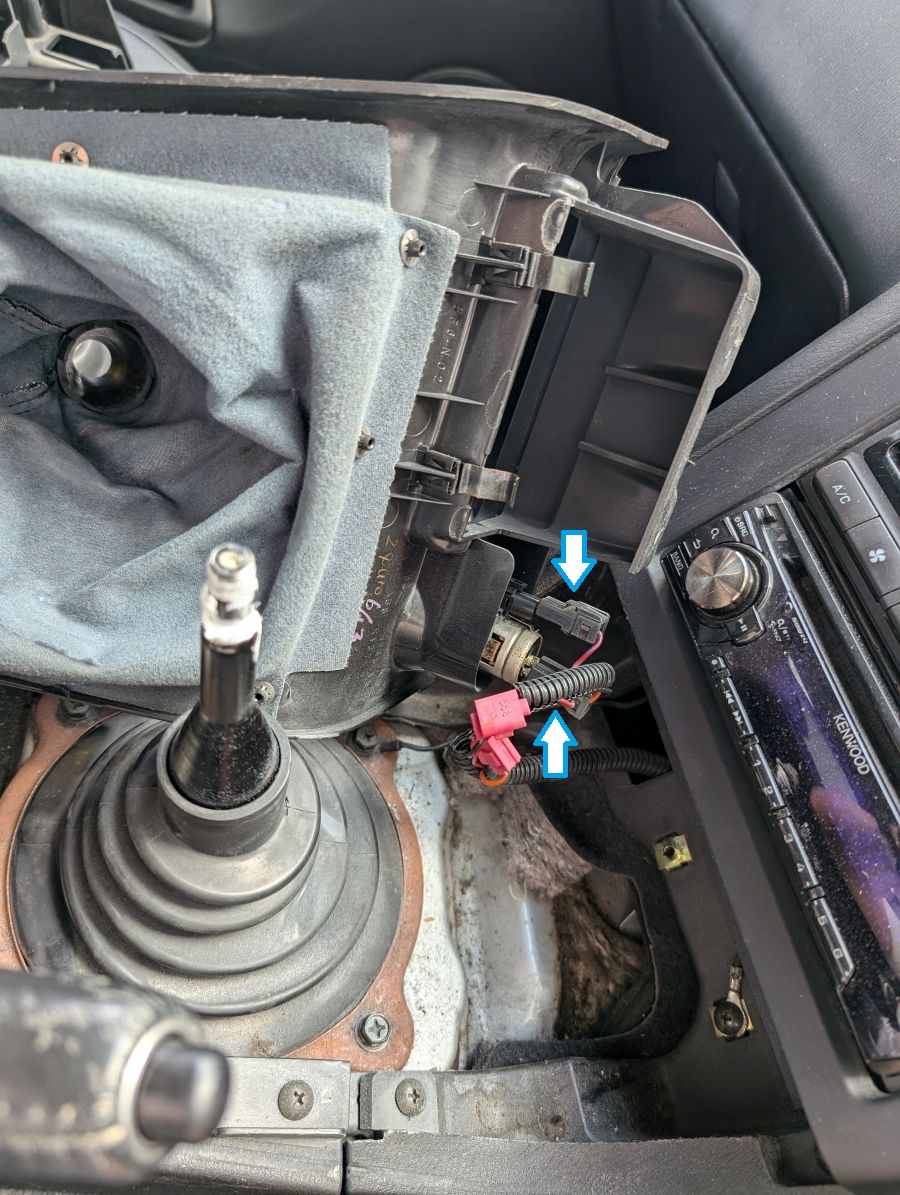
Using a trim removal tool, gently pry the shifter trim upward from the driver's side. Slide the shift boot up and over the shift lever. On the left side are two electrical connectors for the cigarette lighter, indicated by the blue arrows. Disconnect both connectors.
Remove the two screws located behind the ashtray opening.
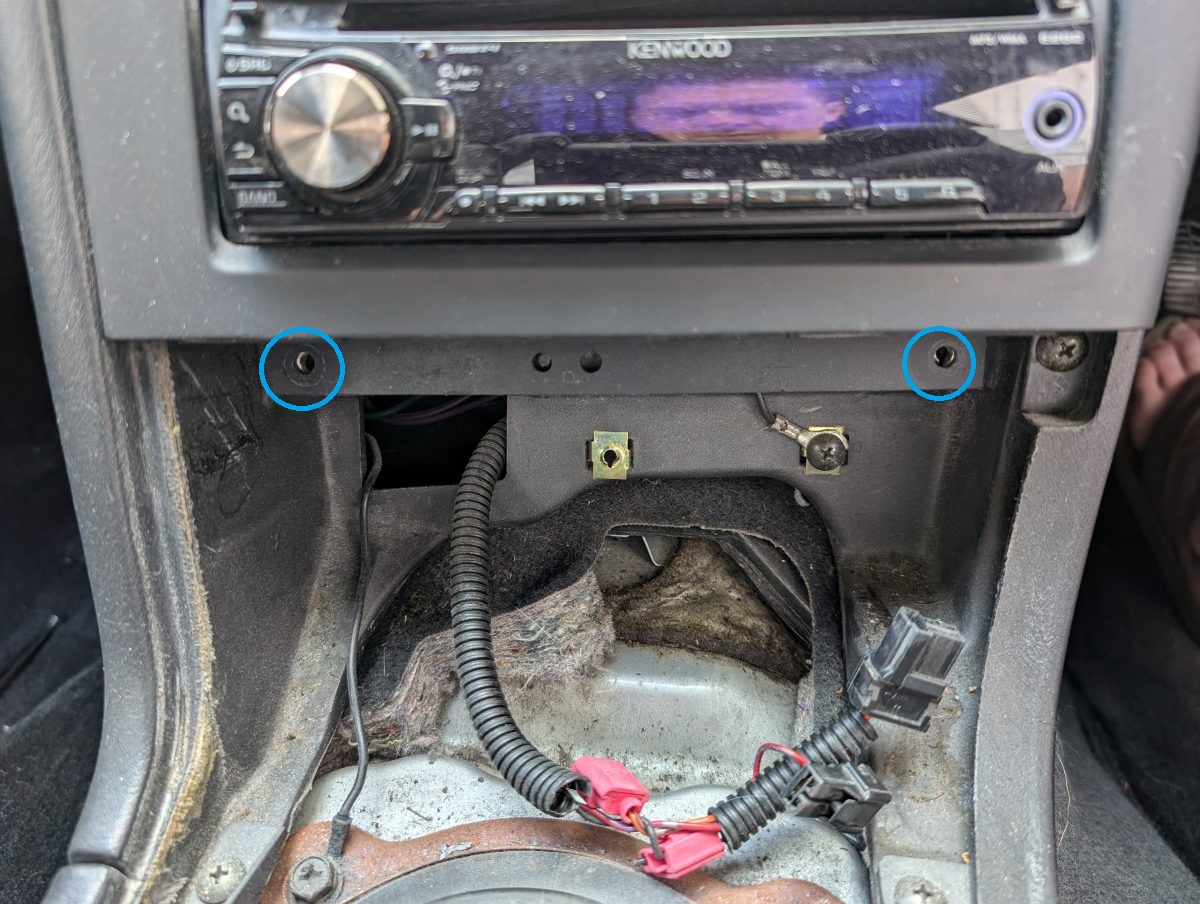
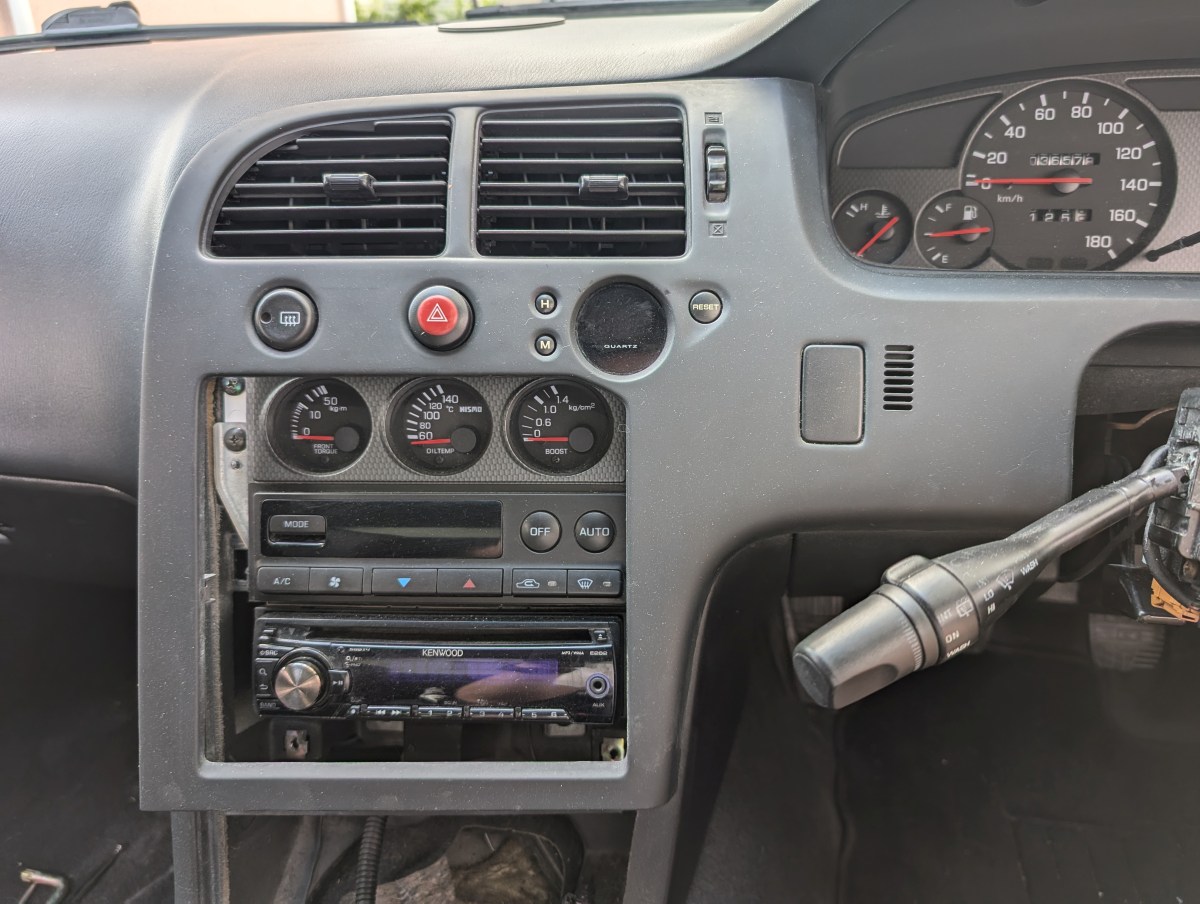
At this point, only retaining clips are holding the center dash trim in place. Carefully pull outward from the bottom and work your way across from the passenger side to the driver's side until the trim is separated from the dash by several inches.
On the left side, disconnect the four electrical connectors. The photo only shows three arrows, but there is a fourth connector hidden behind the others on the far left. From left to right, these connectors are for the rear defrost, hazard switch, clock, and HVAC controls.
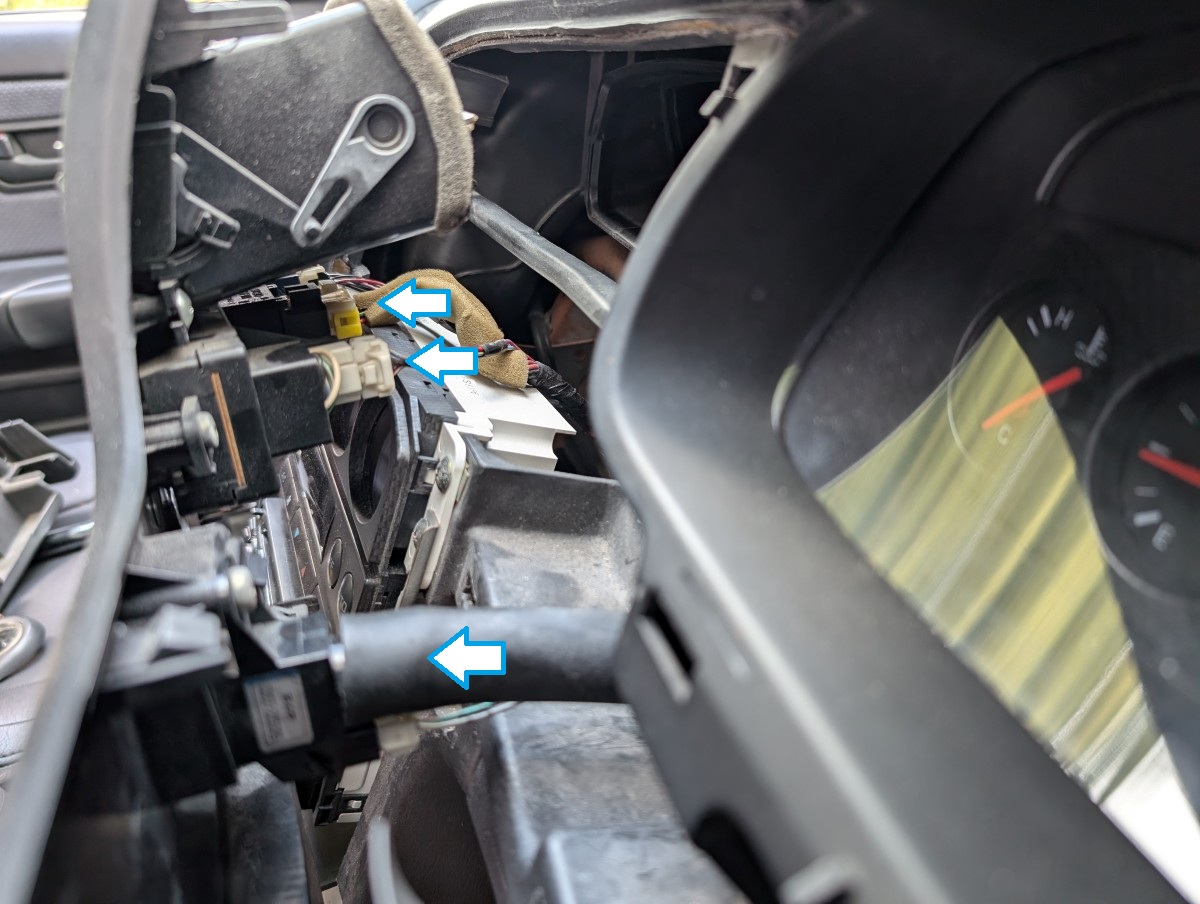
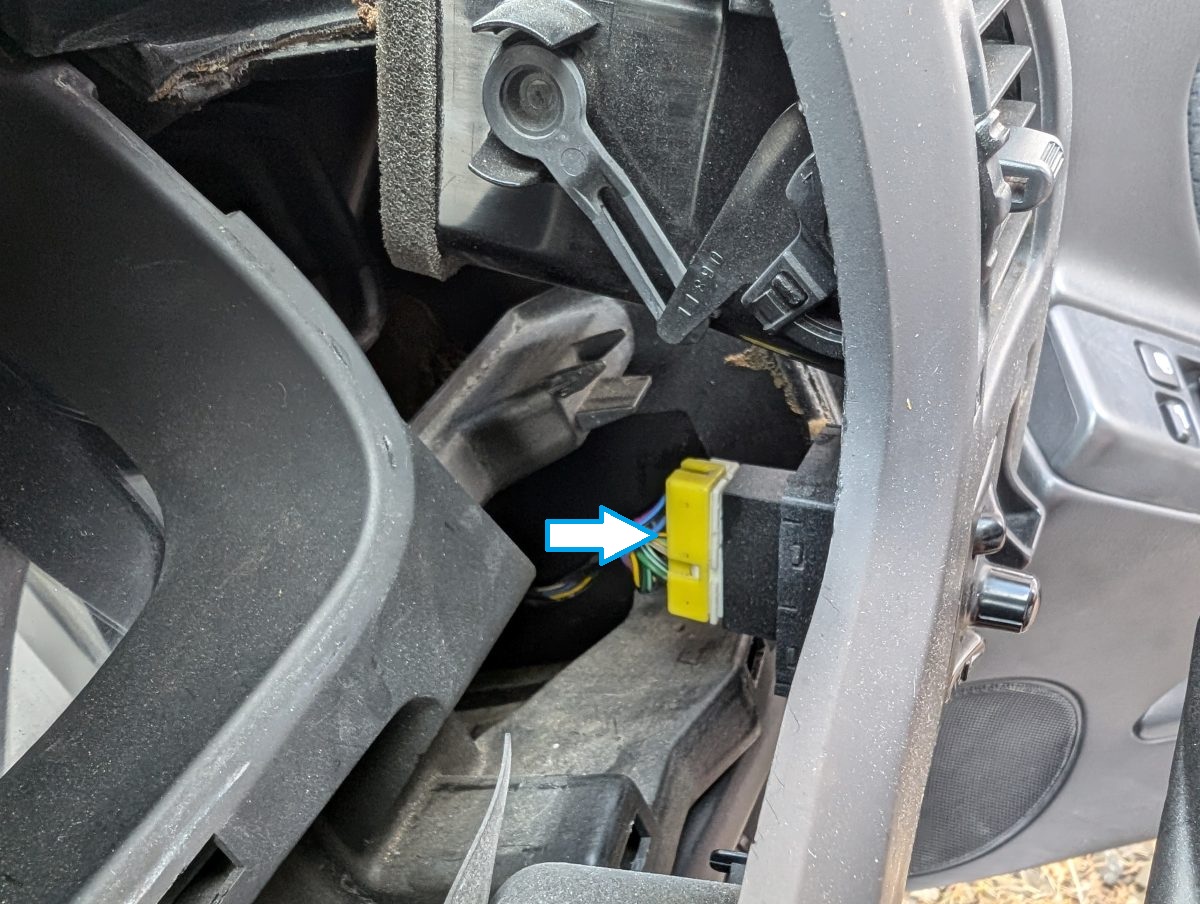
There is one final connector on the right side of the steering wheel for the mirror adjustment switch. Once all five connectors have been disconnected, remove the entire center trim panel from the vehicle.
Locate and remove the four screws securing the trim panel surrounding the gauge cluster. Once removed, pull the trim panel away and set it aside.
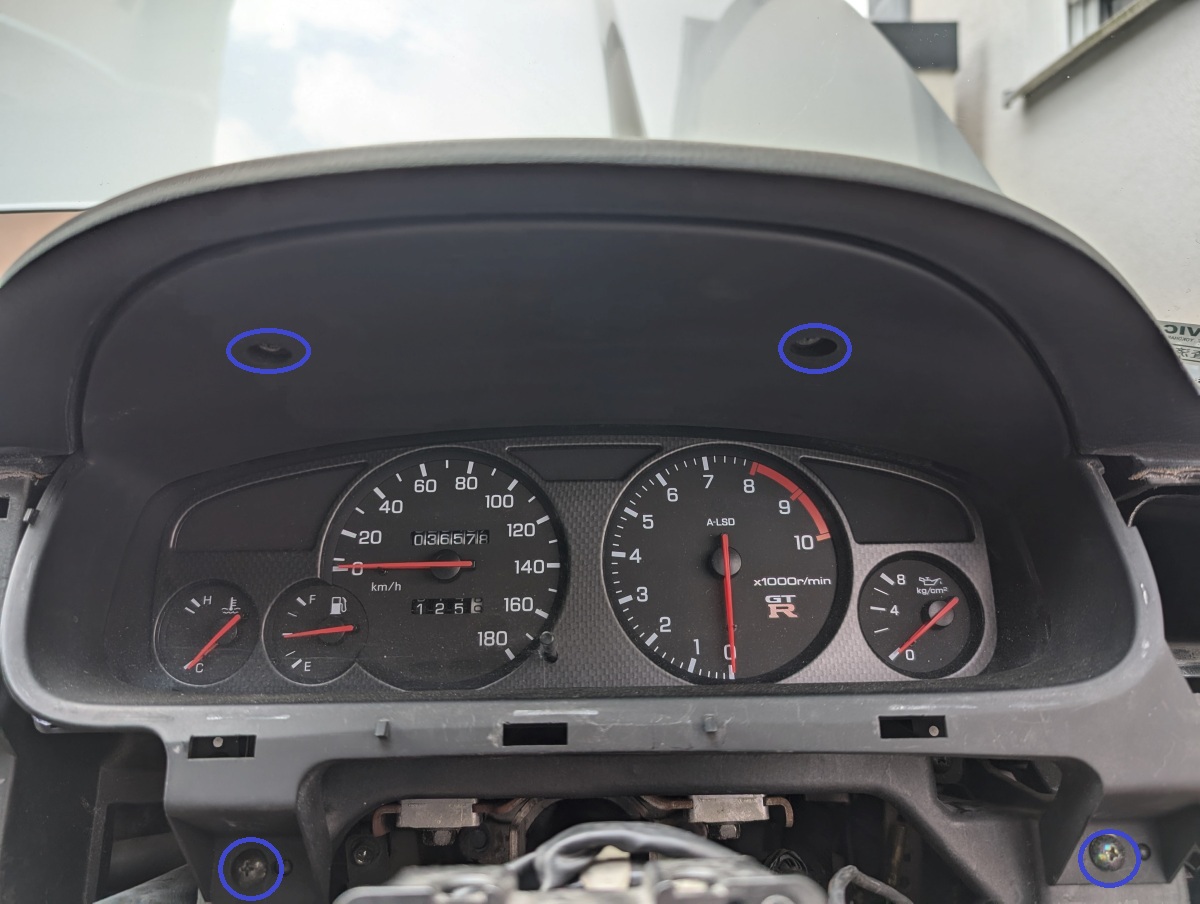
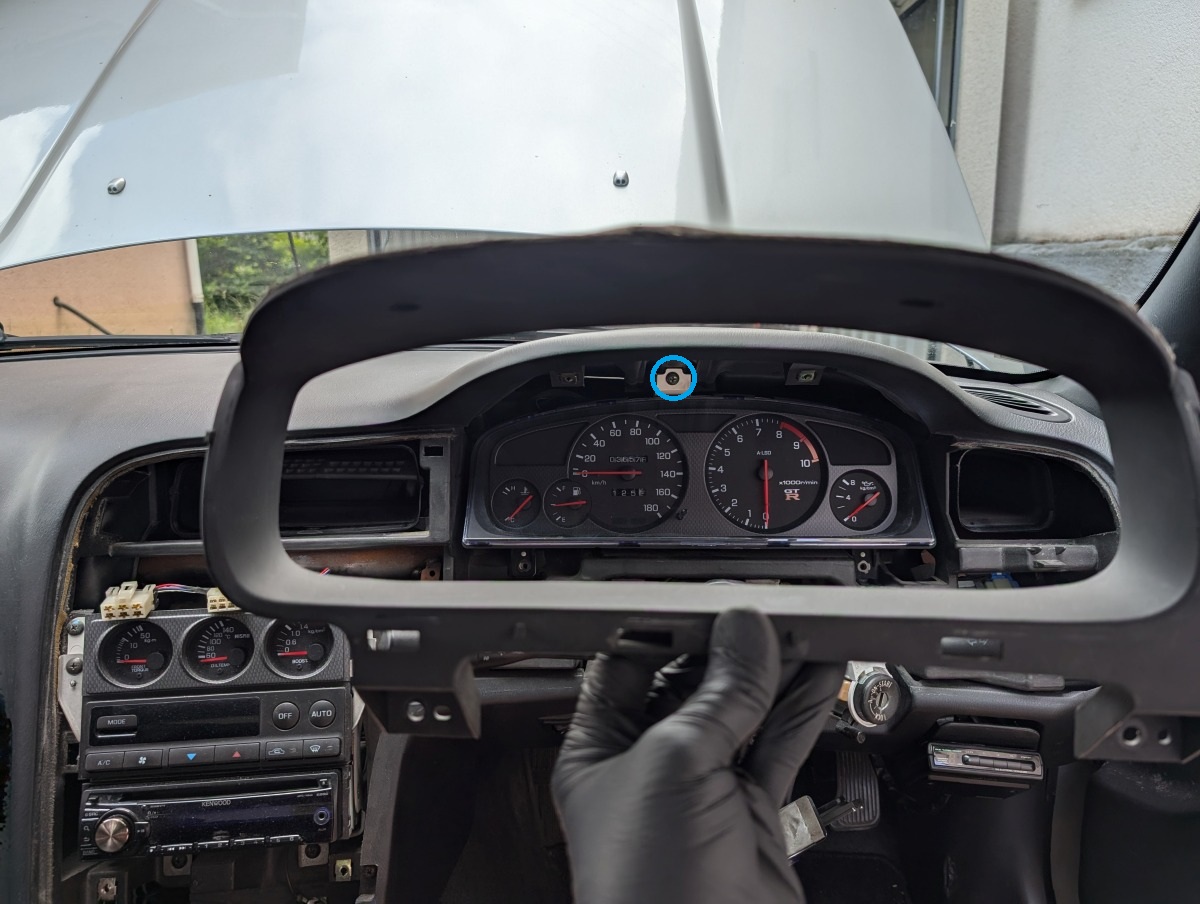
Directly above the gauge cluster is one final screw, circled in blue. Remove this screw as well.
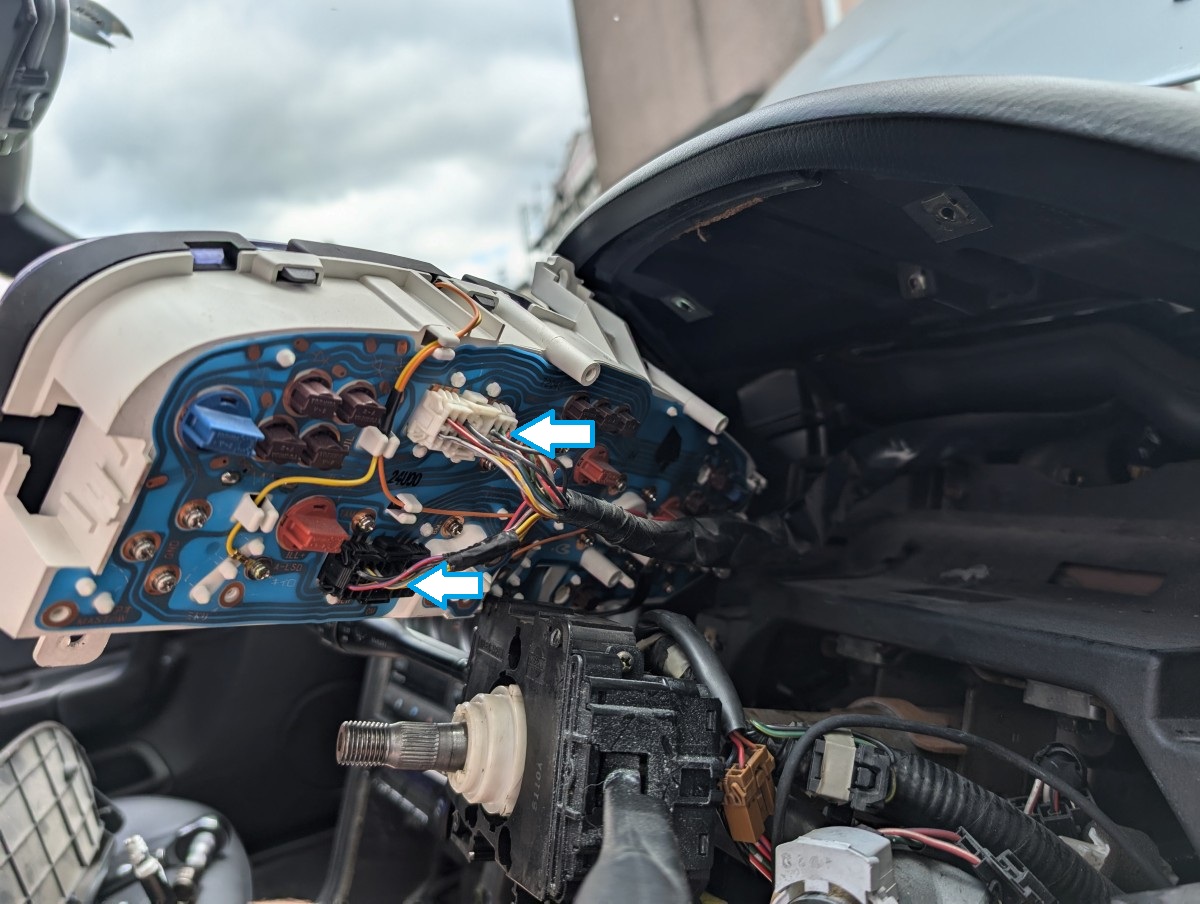
At this point, there are only two main electrical connectors remaining. Disconnect both connectors indicated by the blue arrows, then remove the gauge cluster from the dashboard.
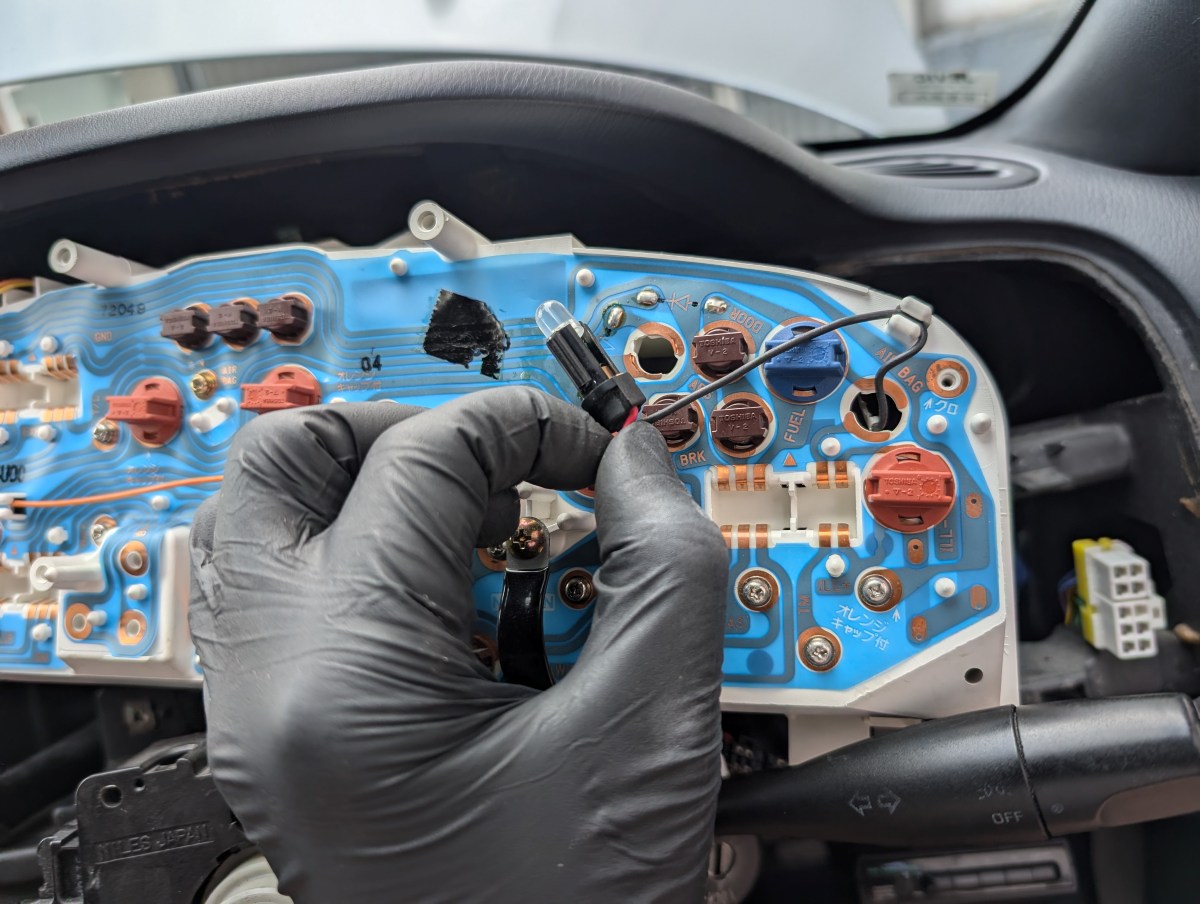
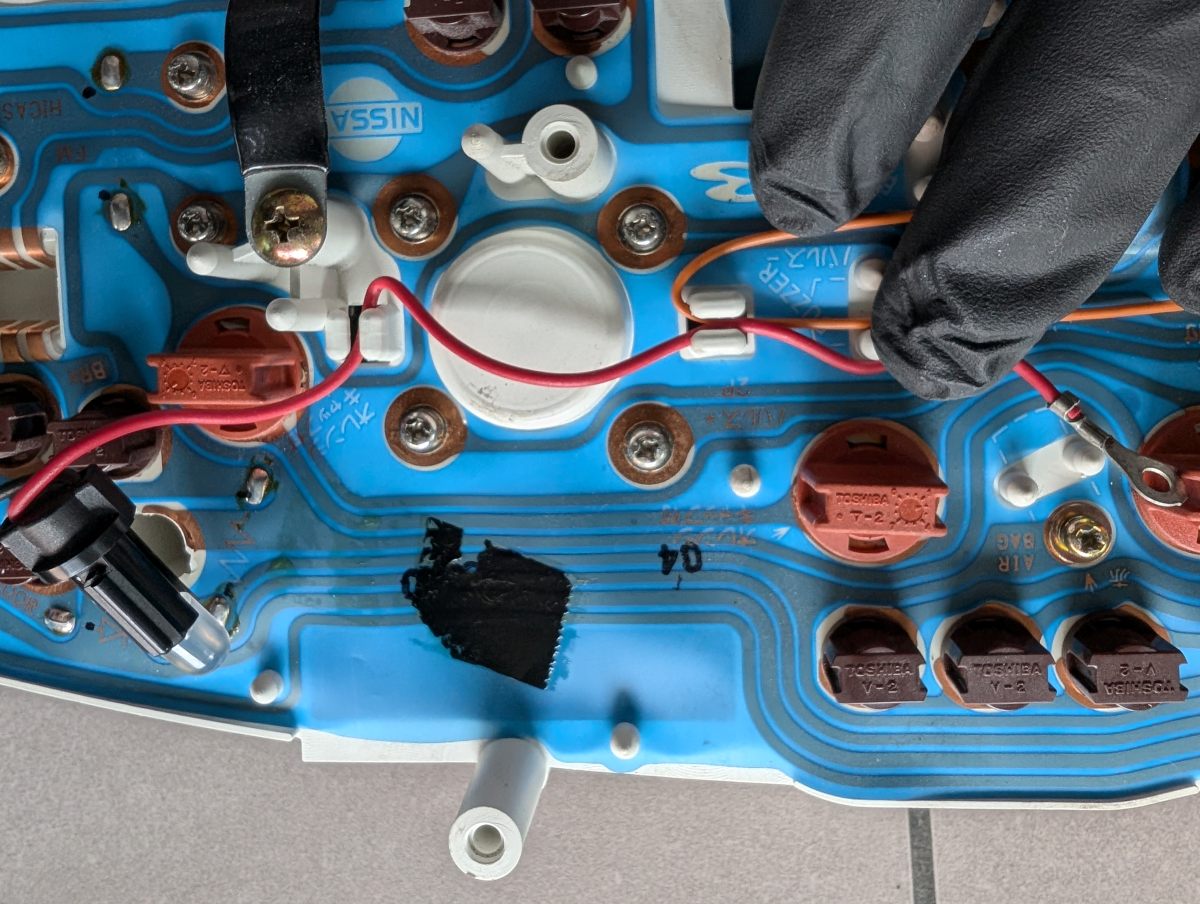
In the upper-right corner of the cluster is the airbag warning bulb. If you are running an aftermarket steering wheel, you may wish to disable this warning light. Keep in mind that removing the bulb from the cluster only removes the warning from the gauge face. The bulb itself may still remain illuminated behind the dashboard.
Follow the red wire from the bulb to the mounting point labeled AIR BAG. Remove the retaining screw and fold the wire back into the clip next to the BUZZER label to prevent it from rattling.
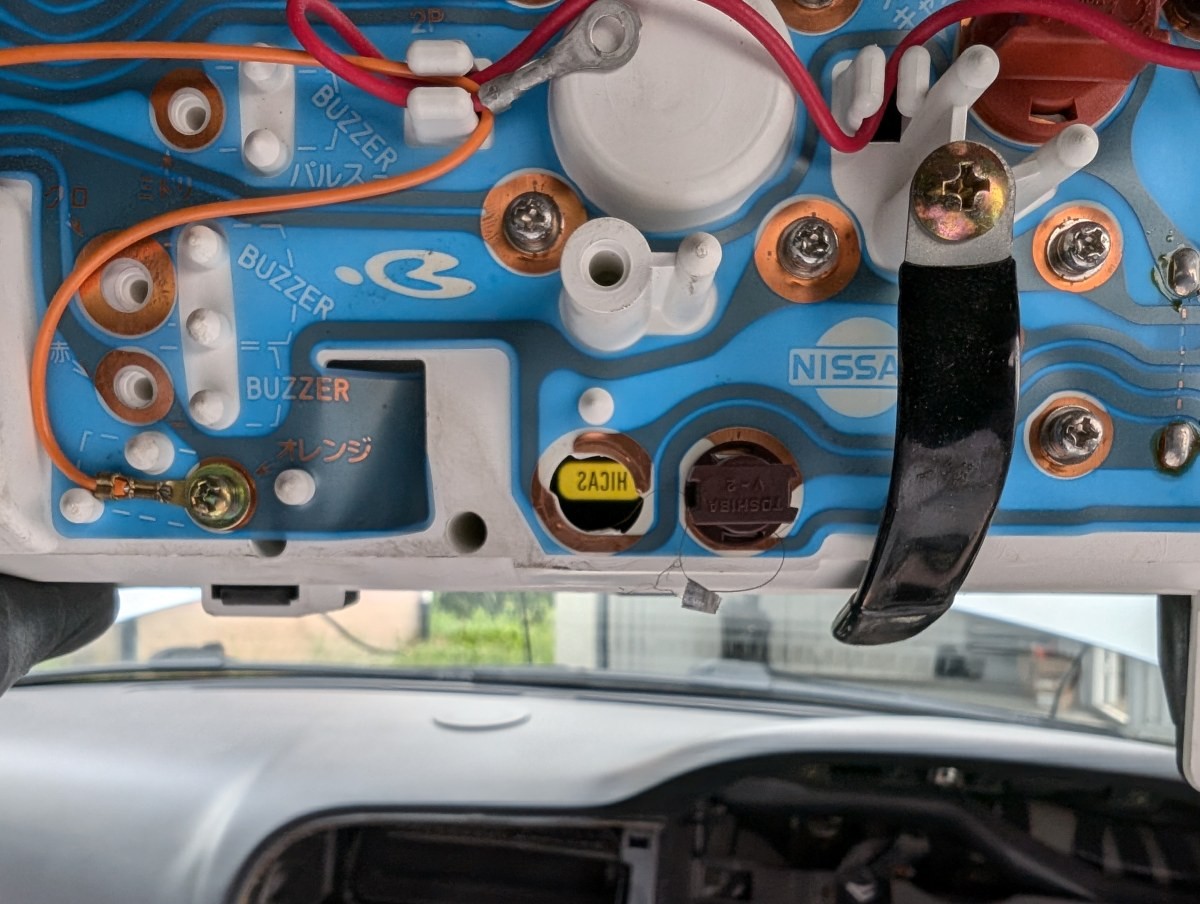
At the lower-right area of the cluster, second position from the black tab, is the HICAS warning bulb. If your vehicle is equipped with a HICAS delete kit, you may wish to remove this bulb to eliminate the warning light from the dashboard.
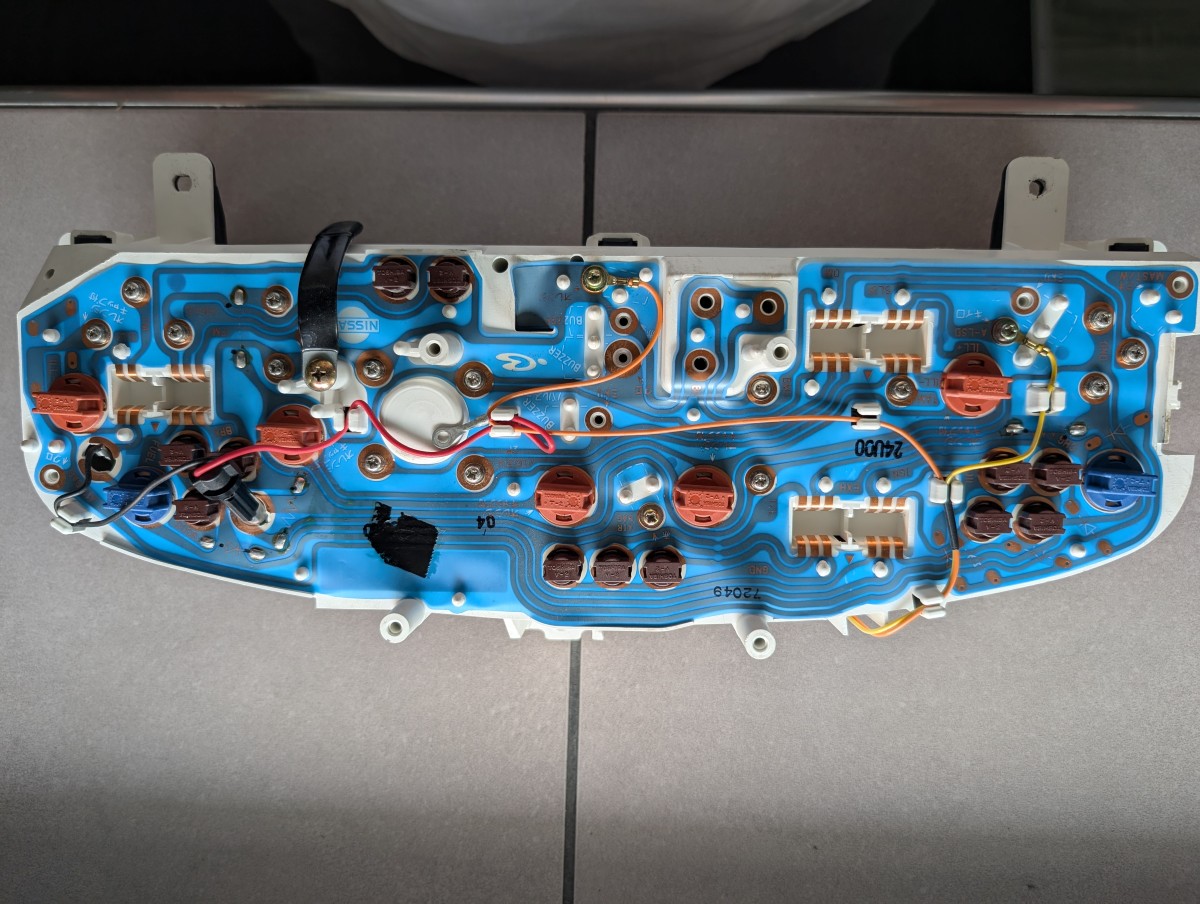
Finally to close the write-up out, I have translate the back of the wiring diagram for you: クロ: White / オレンジ キャップ付: Orange Cap / 赤: Red / ミドリ: Green / アオ: Blue / キイロ: Yellow バルス (+/-): Pulse + or ー