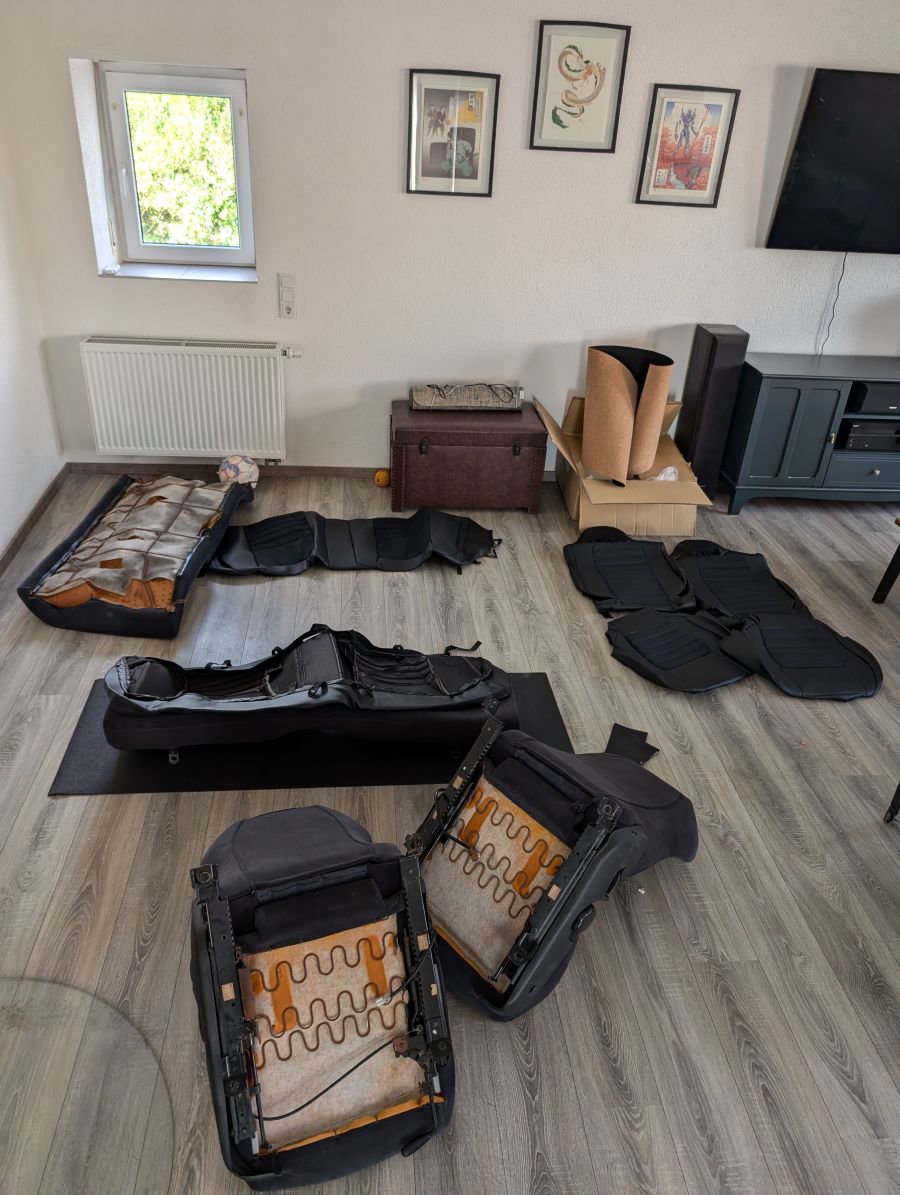
R33 Seat Removal & Cover Install
Here is everything I suggest you gather before you begin. Invest in some decent trim removal tools, a flat head warped in duct or painters tape will work in a pinch. The wrench is an 8mm and you probably do not require ¼ drive, but helpful for that back seat area. The instructions that come with the seat kit are useless, unless you can read Japanese. If you would like me to translate something for you, just let me know. The black tool doesn’t look like much, but it is extremely useful later on. So, don’t lose it.

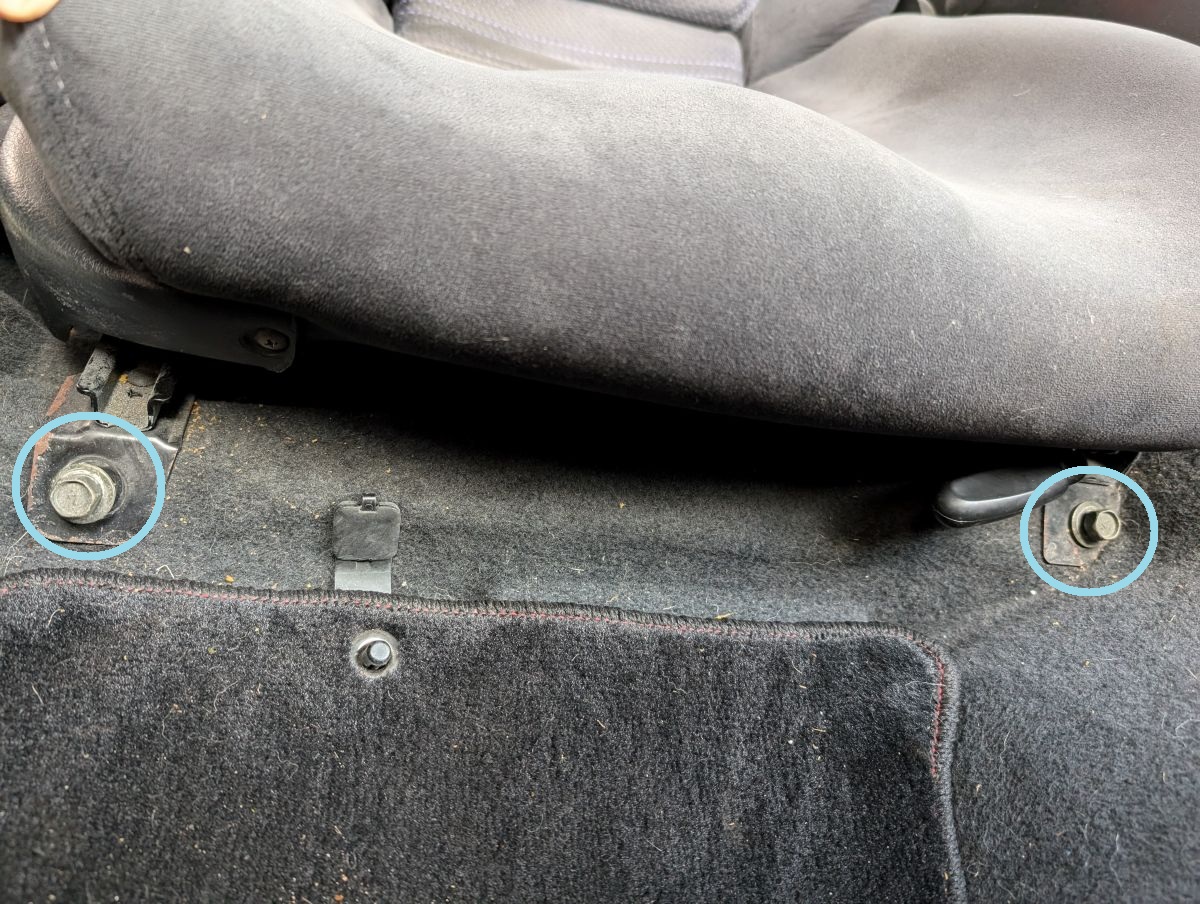
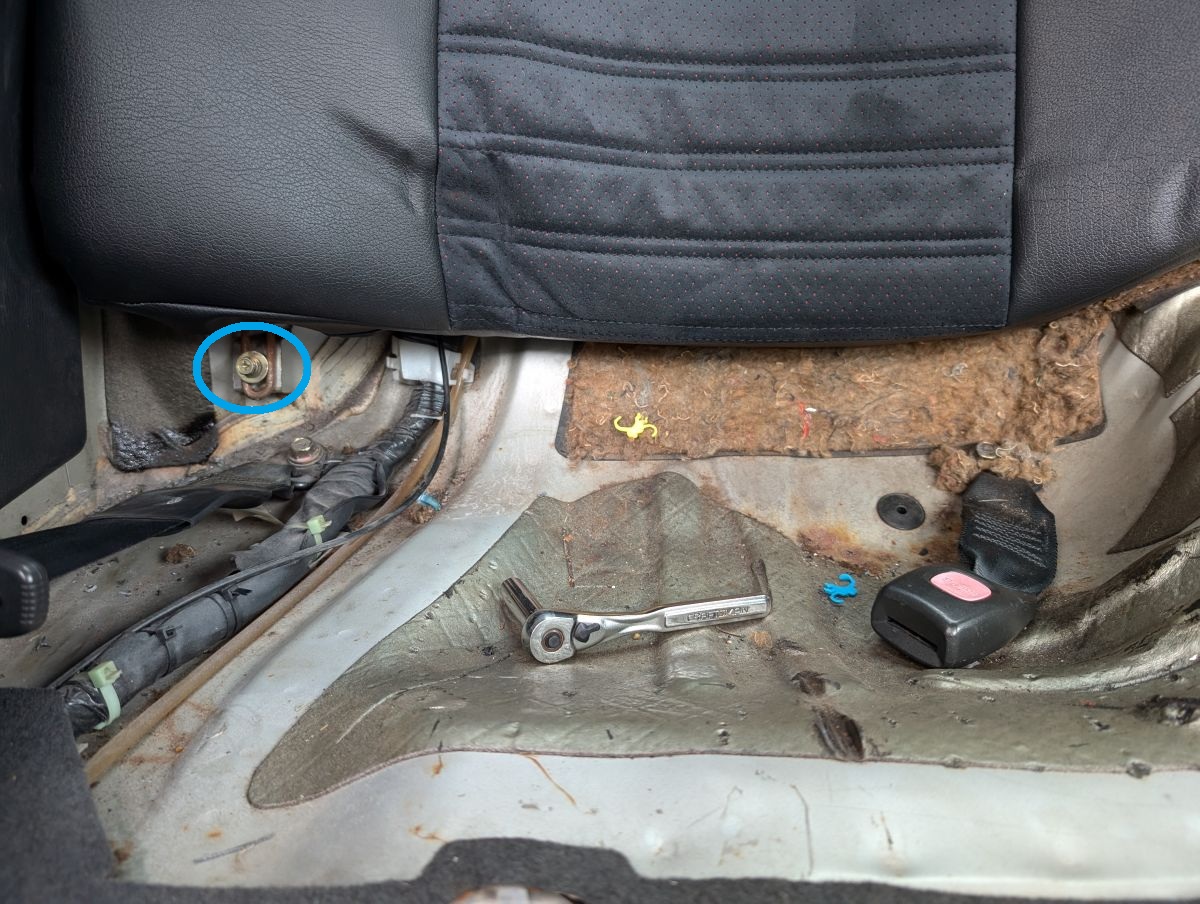
Let’s get to it, remove these two bolts circled in blue located at the front of the driver/passenger seat.
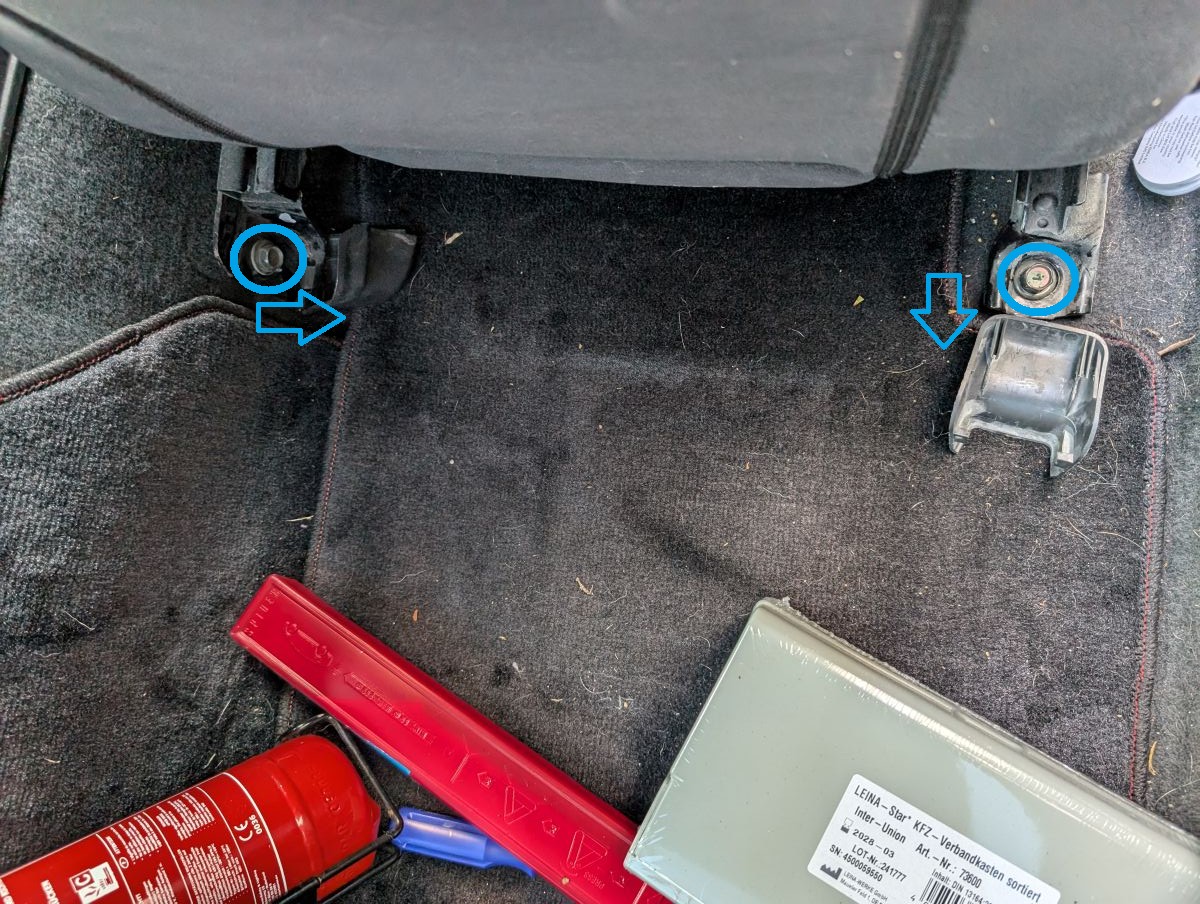
In the back you have to remove the two covers next to the arrows to expose the next two bolts. You will not need a screwdriver or any trim removal tools, you can pop the covers off with just your hands.
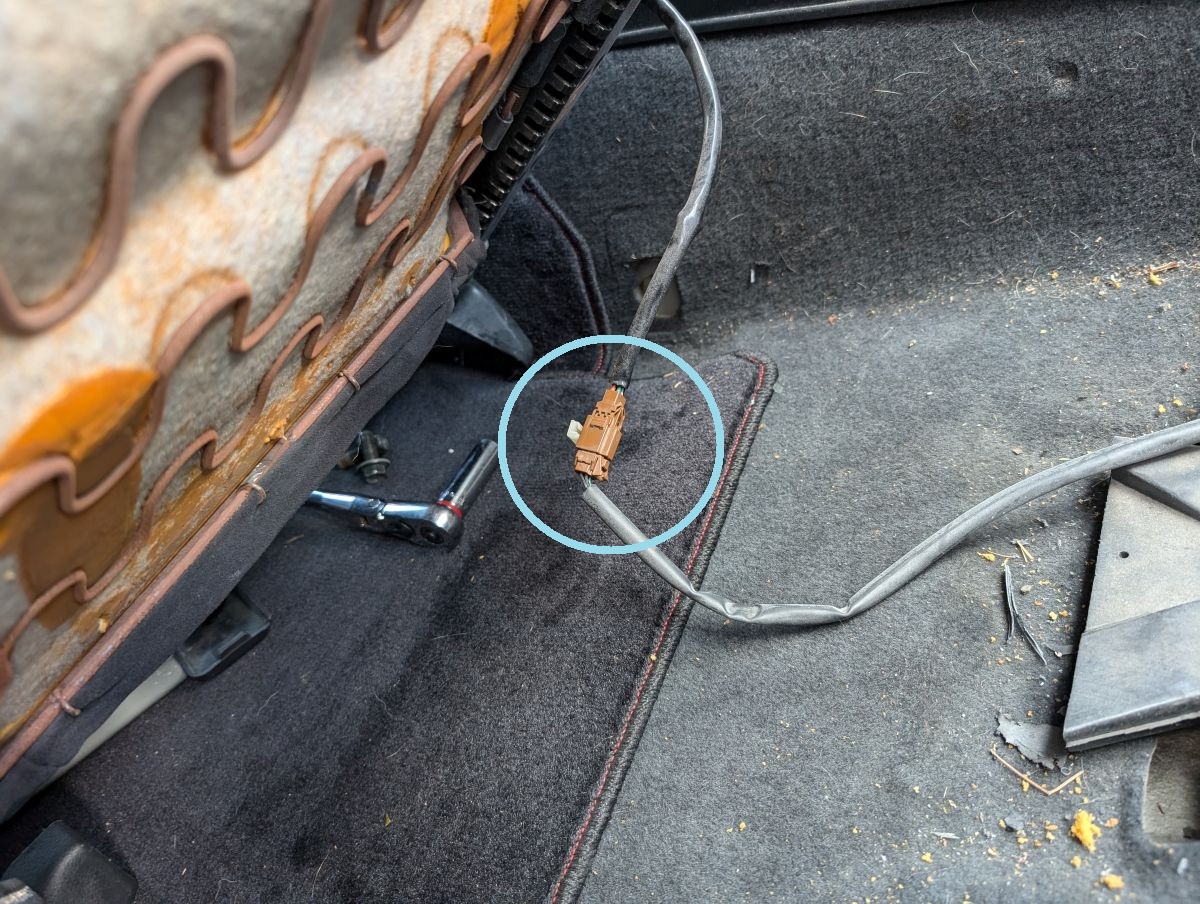
Those are the only four bolts you need to remove, but do not yank the seat out just yet. You need to unclip the seatbelt light trigger circled in blue located under the seat. Exact same process for the passenger seat as well. Once they are out of the way, it’s a great time to get in there and shop vac the carpet.
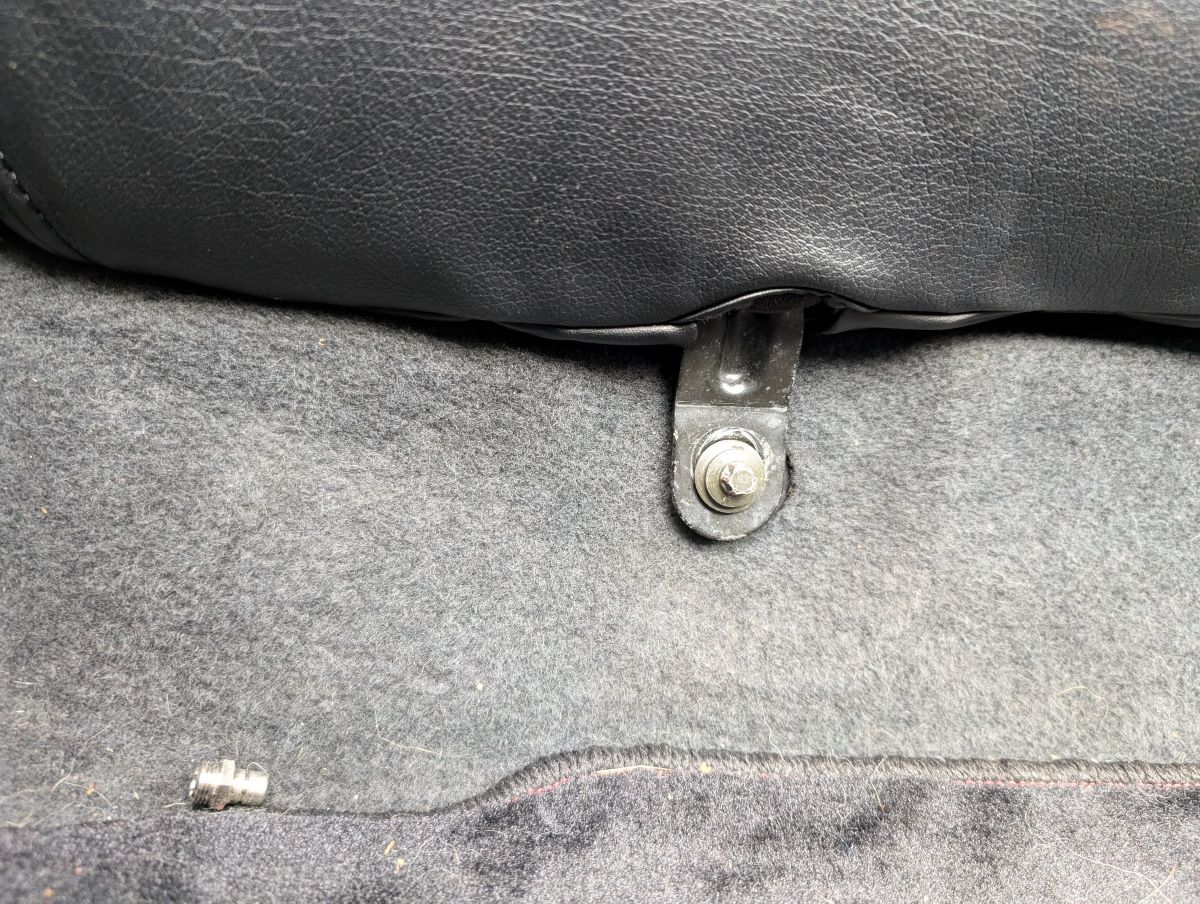
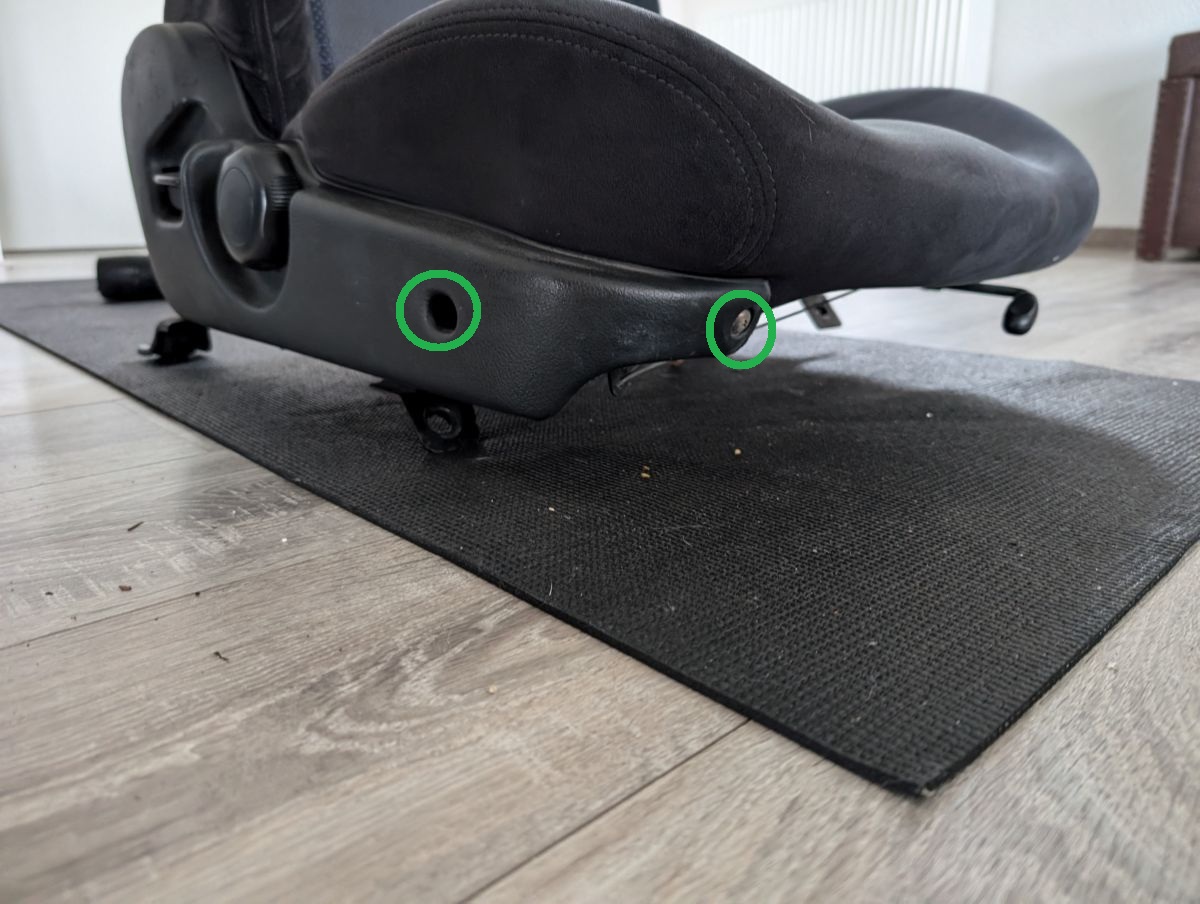
Once the front seats are out of the way, the back seats are pretty easy to get to. Remove this 8mm bolt located at the bottom of both the left and right sides.
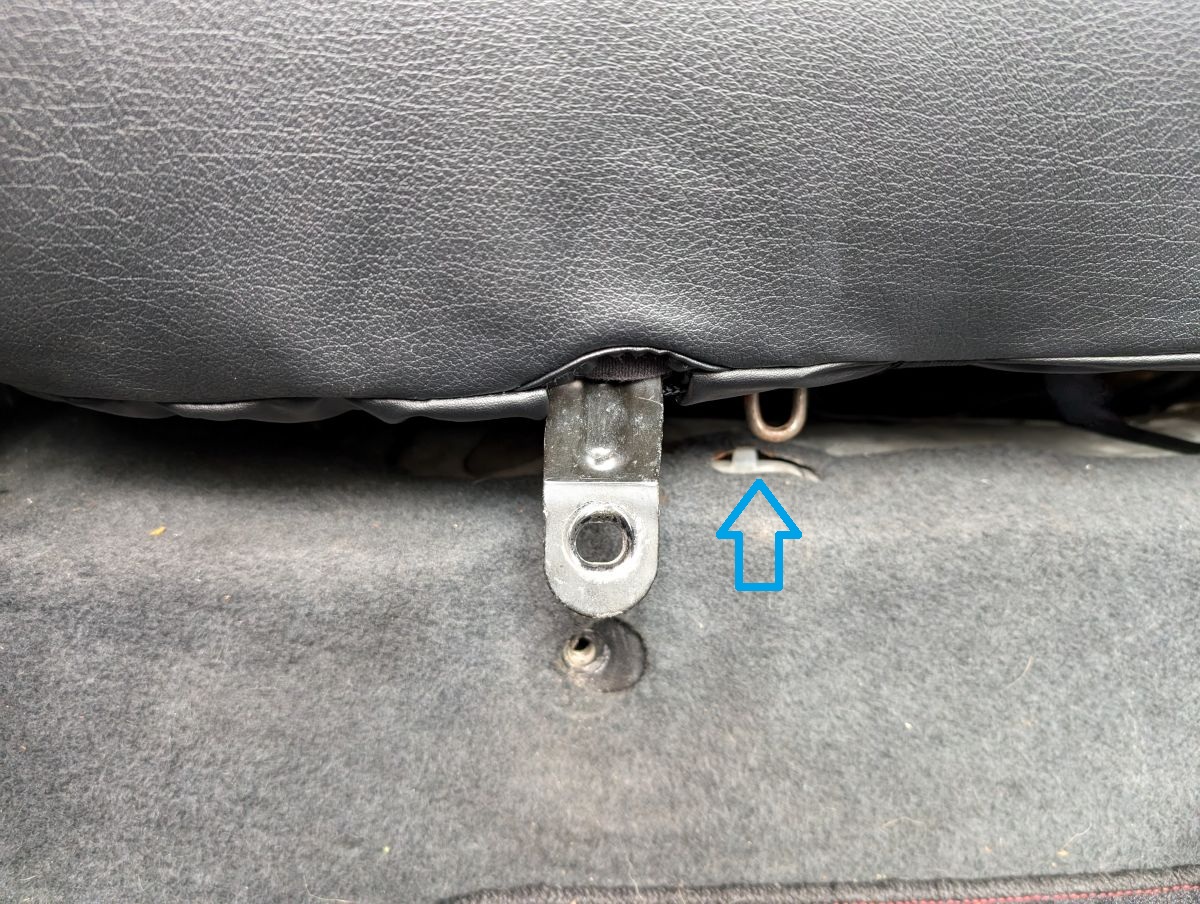
You can gently pull up on the seat and this metal tab should pull out of its clip.
Work the metal tab back and forth to free it. Be careful not pull up too hard, the clip itself is made out of plastic and appeared to be a little flimsy.
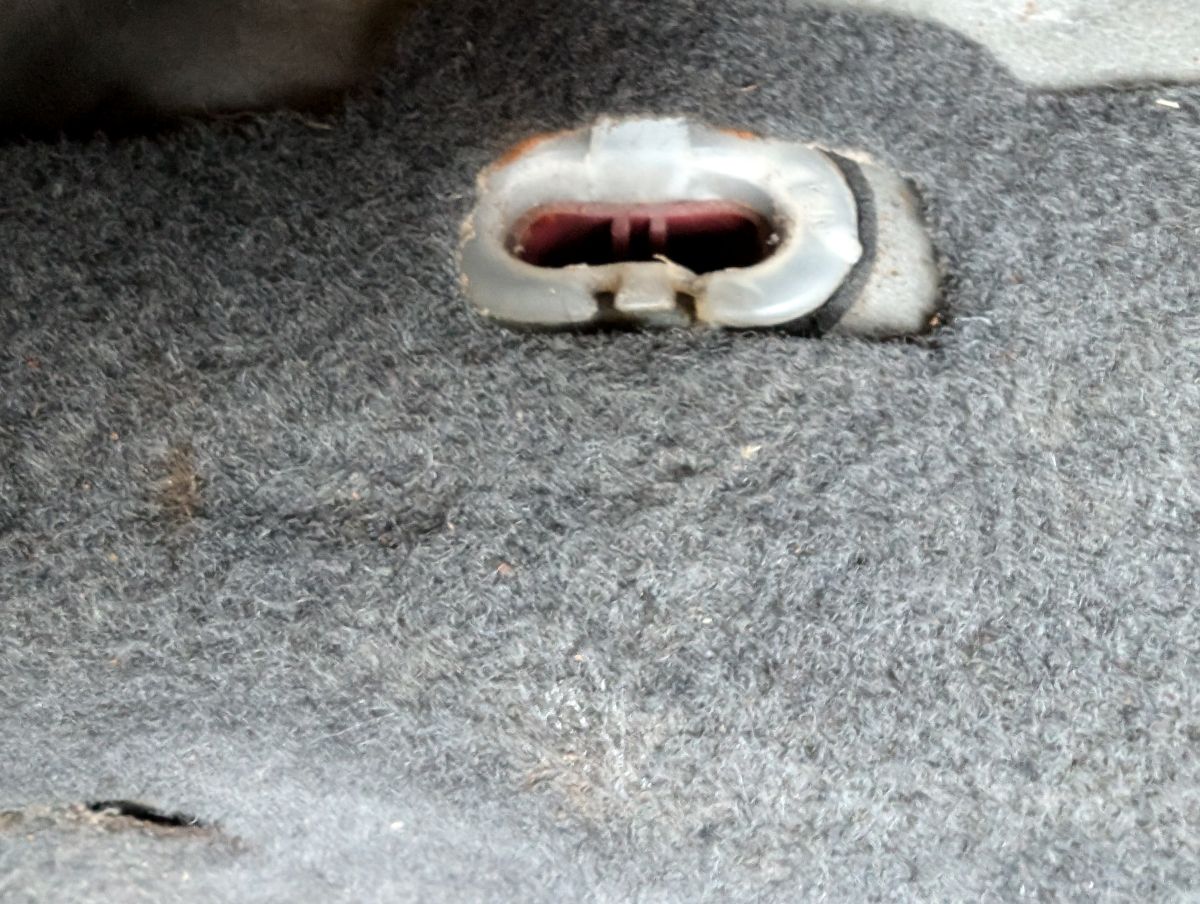
Once you pull the bottom section out of the car, you can get to this retaining bolt. Remove it and the one on the passenger side as well. The rest of the upper section is held in place by a hanger bracket. Get a hand under the bottom of each side and gently rock left to right while pulling up to free it from the bracket. I wish I would have snapped a picture of the bracket itself, but it’s easy to take off. It’s a lot harder to put back on, haha.
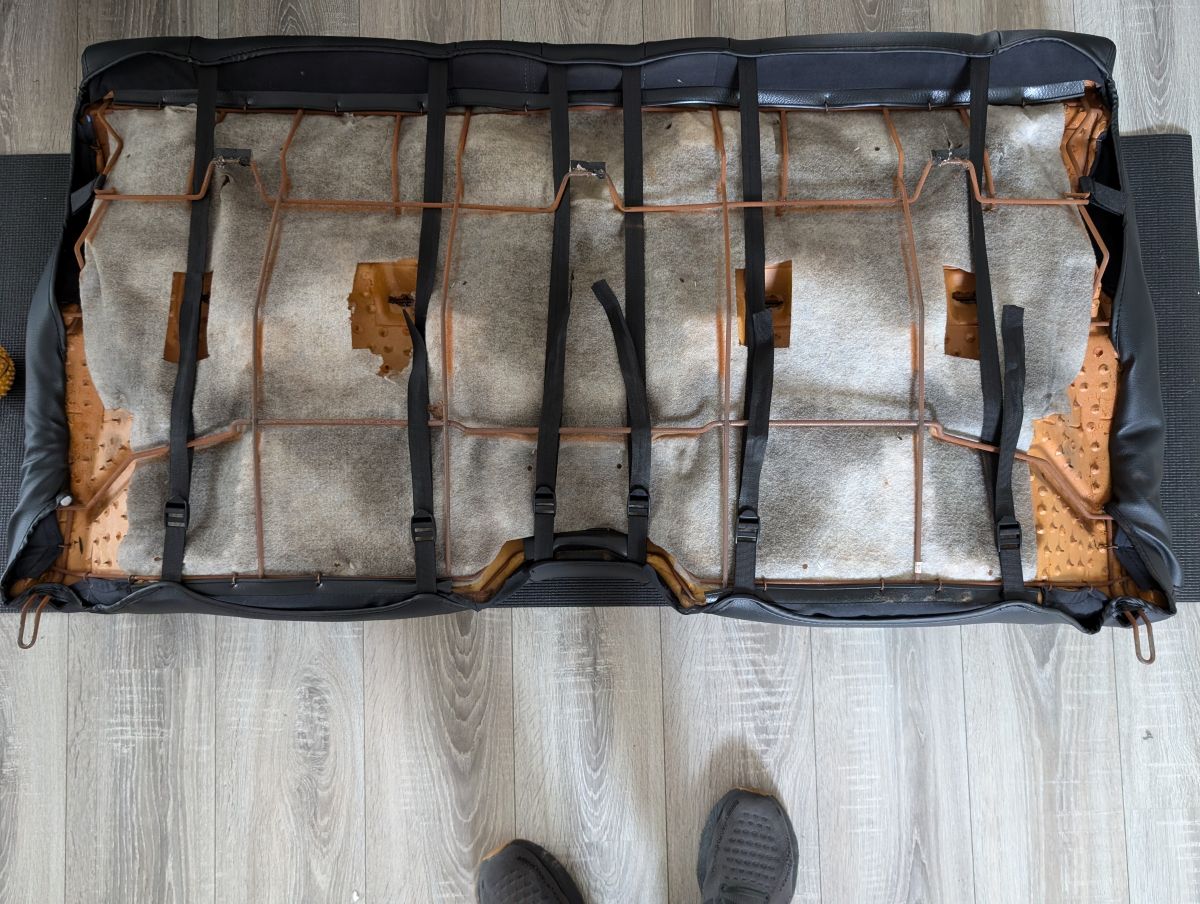
Alright, if you are working outside on concrete, be careful you can scratch up your rails. I chose to work inside and put some yoga mats down so that the rails didn’t scratch up my floor.
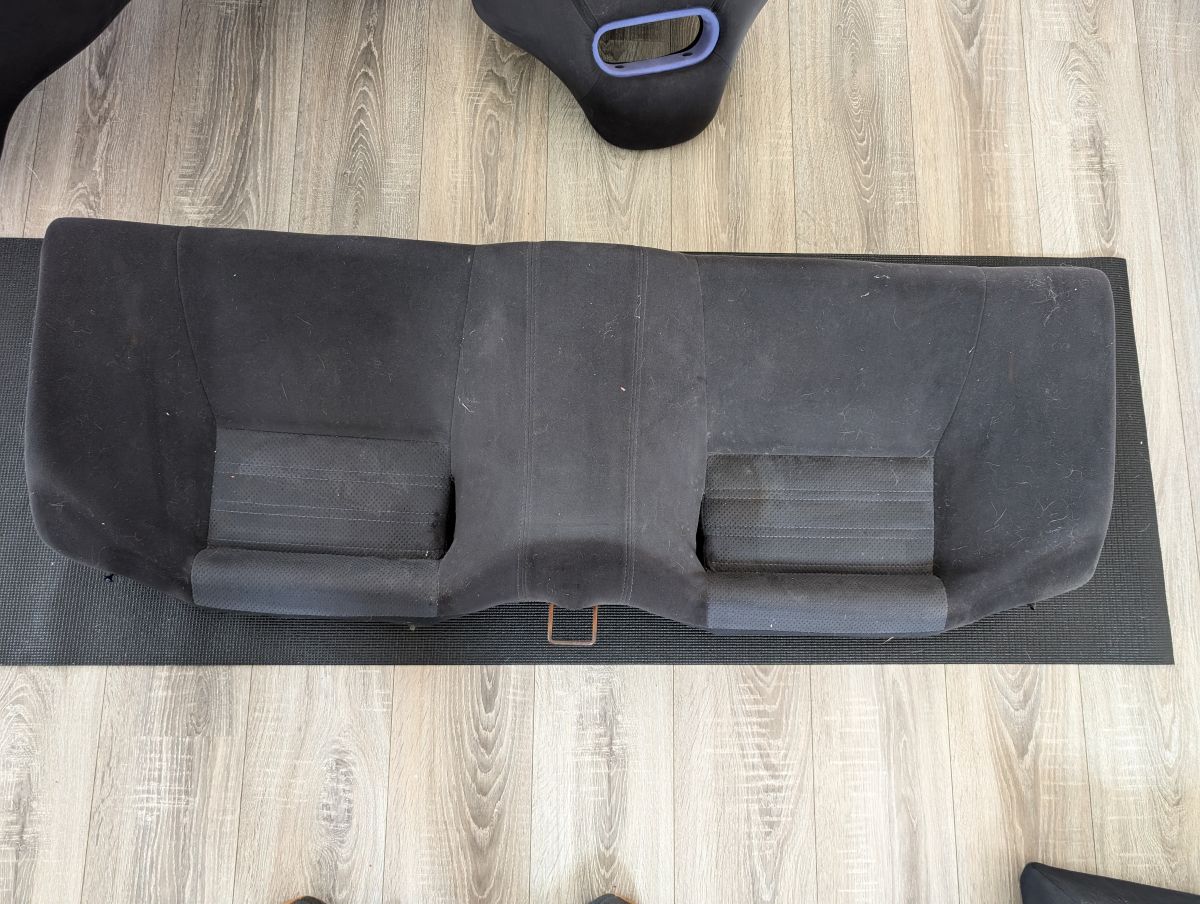
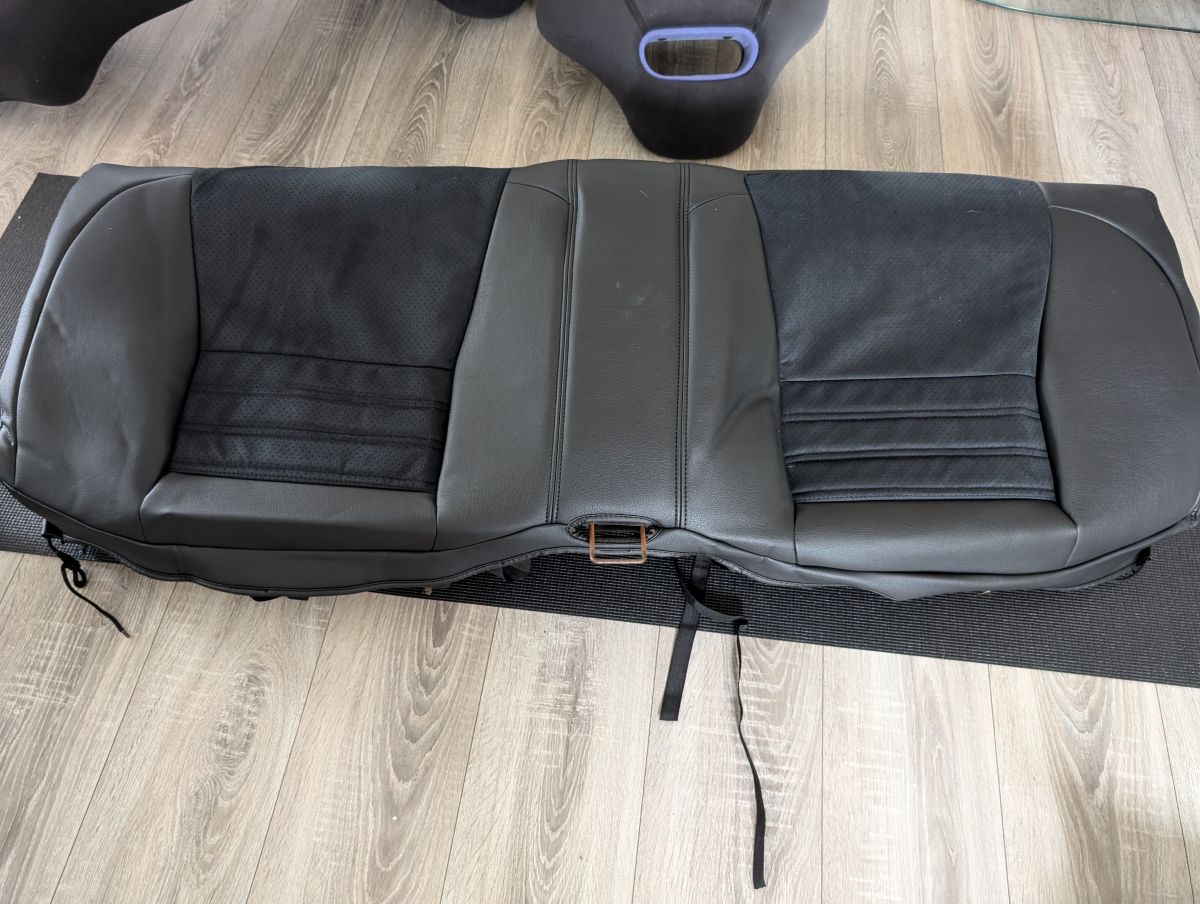
I started with the back seats, they seemed to be the easiest to install the covers on. Let’s start with the bottom.
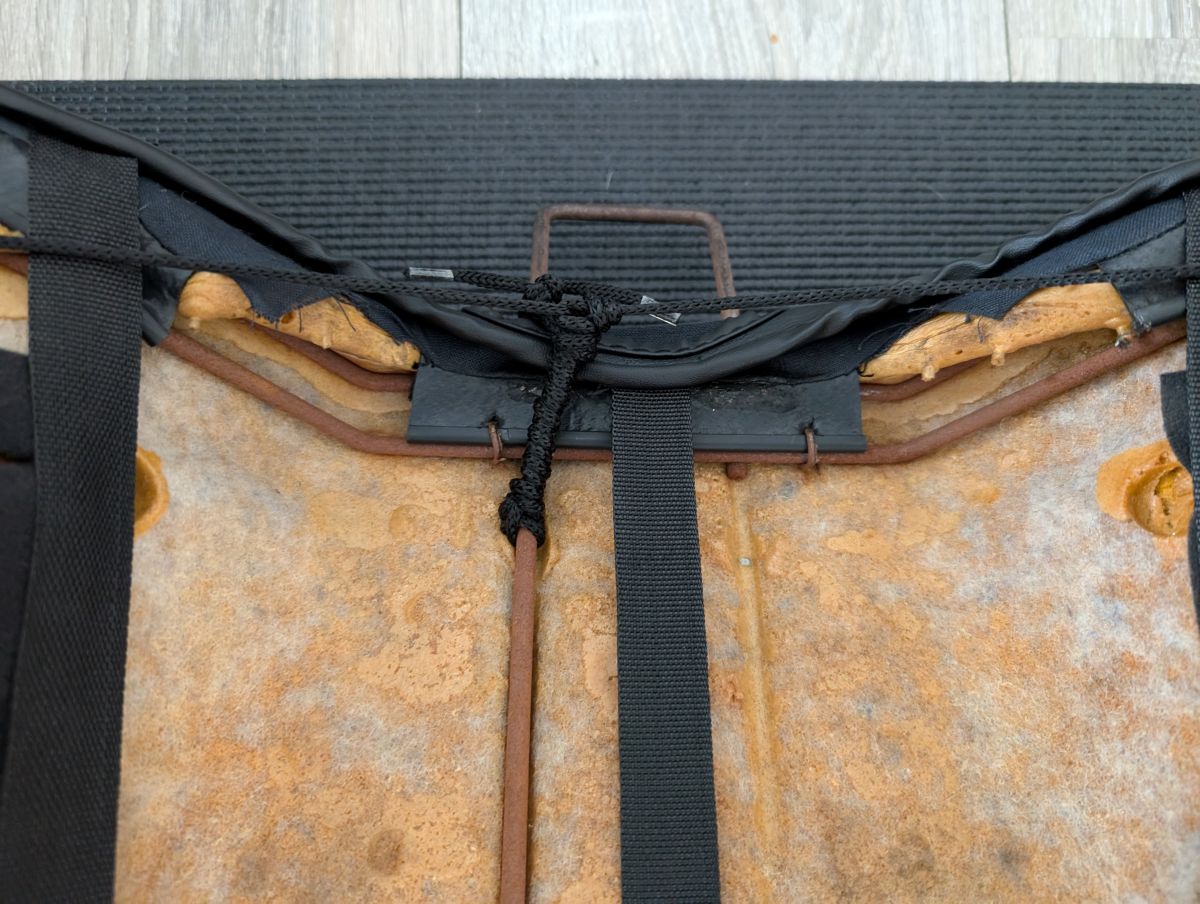
Lay out your cover and use the metal bracket sticking out on the back as a reference point to install your cover. The bracket only exist on one side and the cover only has a hole on one side.

Flip it over, find the two shoe laces on the same end as the metal bracket and cinch them down. I used a fair about of pressure and they didn’t break. Don’t be afraid to pull them as tight as you can.
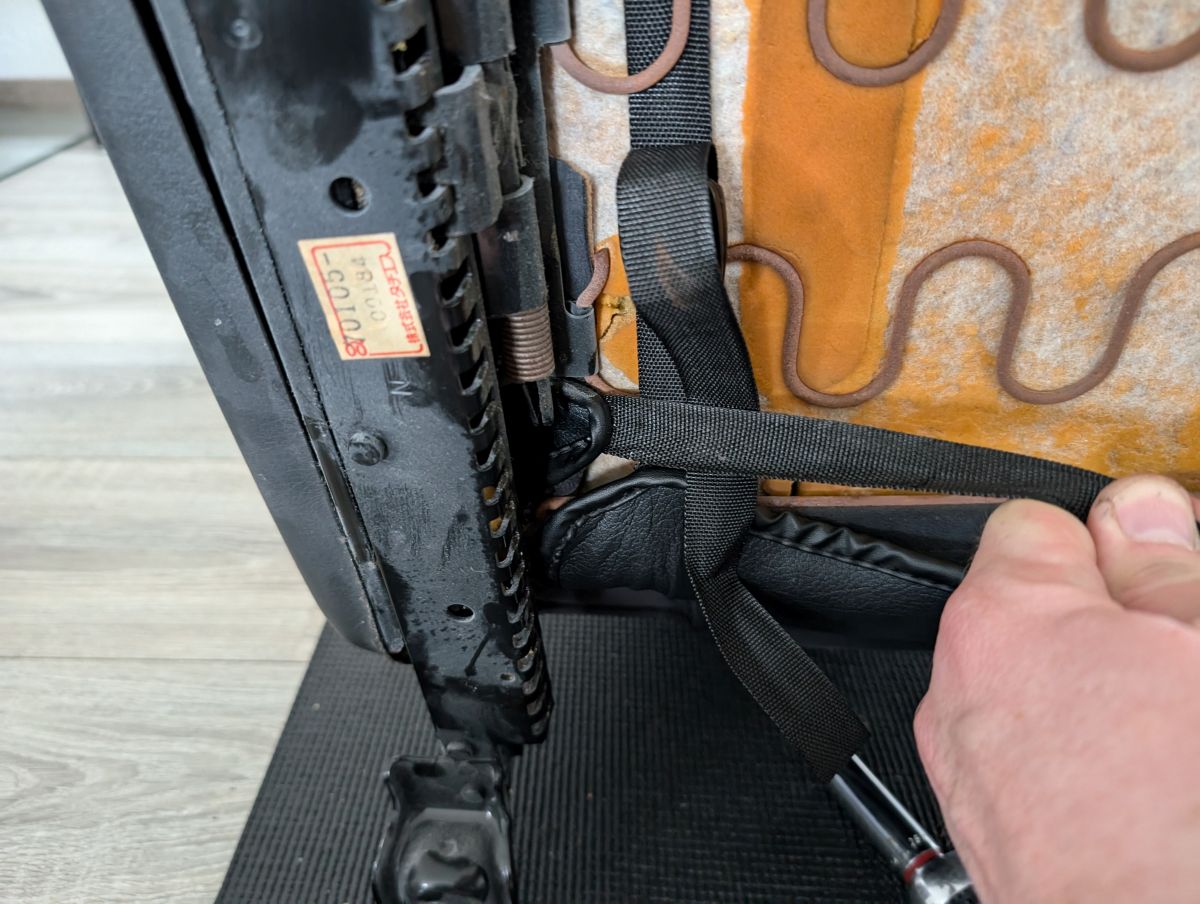
I anchored the laces on a rod running across the back seat closest to the bracket and wrapped the excess string as tight as I could before typing it off at the metal brackets origin point.
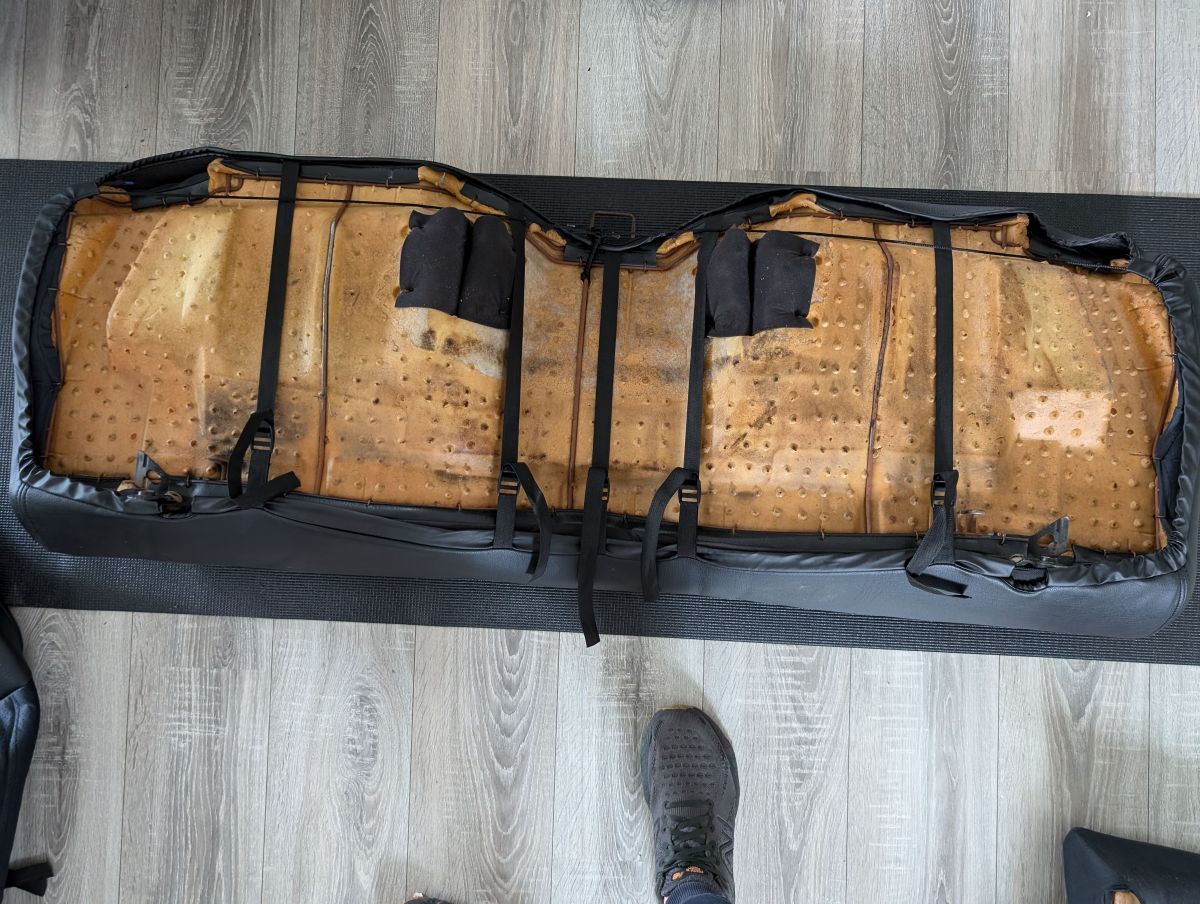
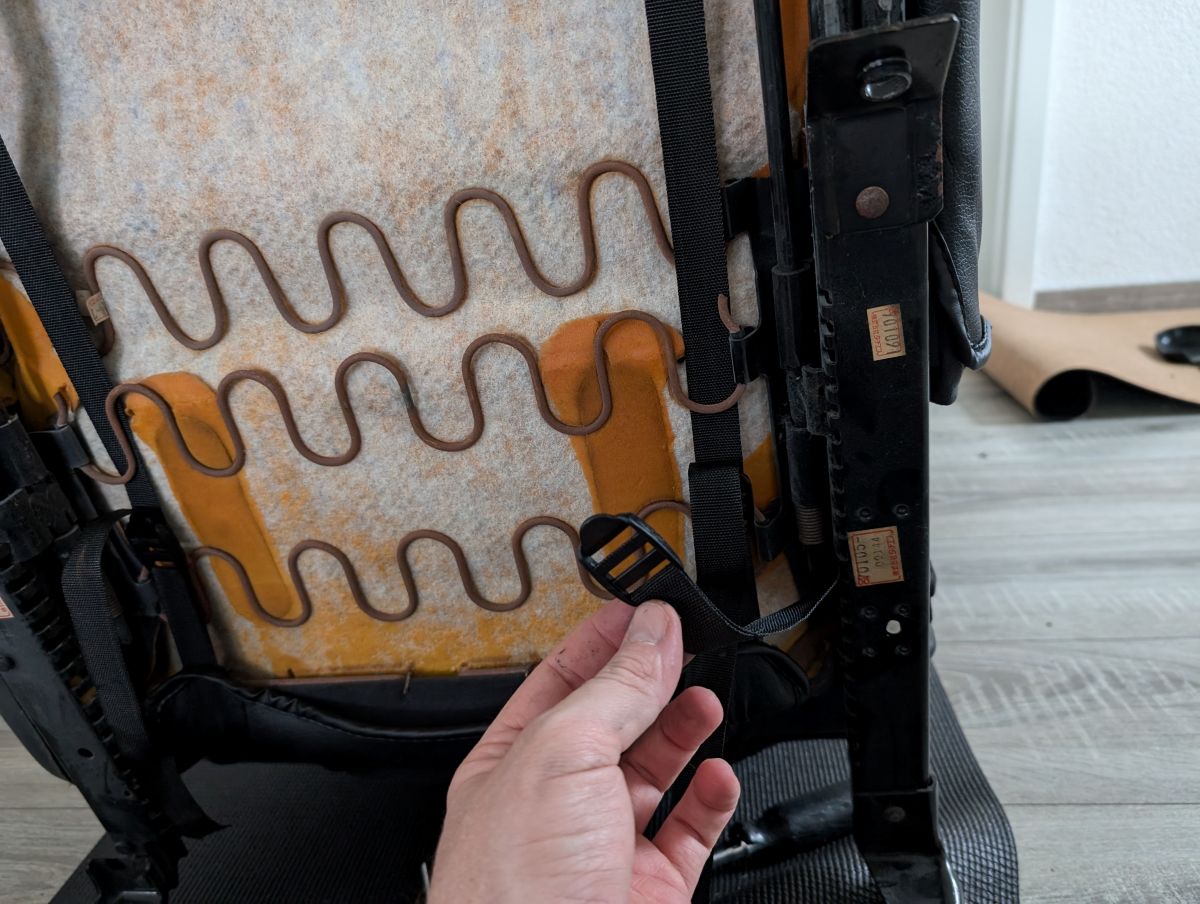
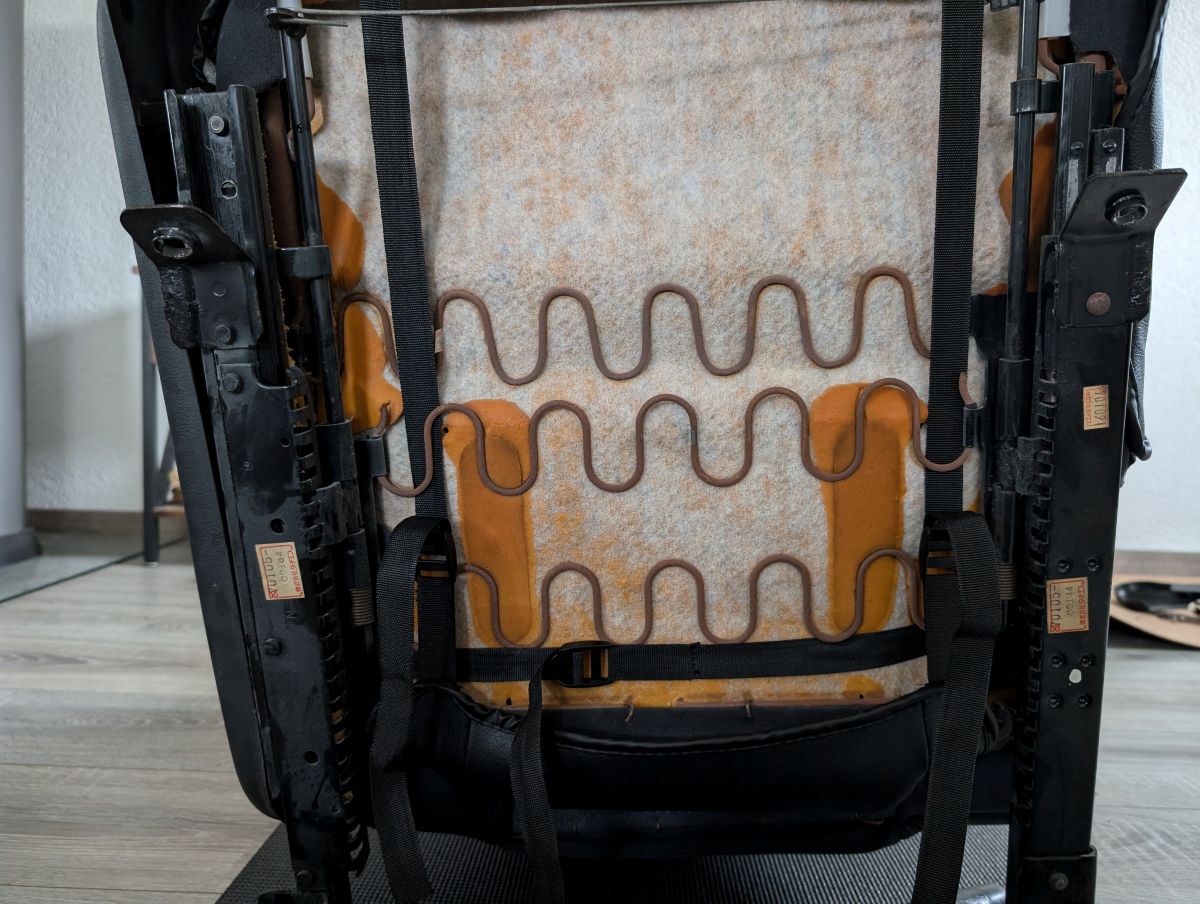
Next, you can tighten down the five straps on your kit. These are pretty sturdy, so give each one a good tug.
Easy, right? Now lets get the top from the back seat done.
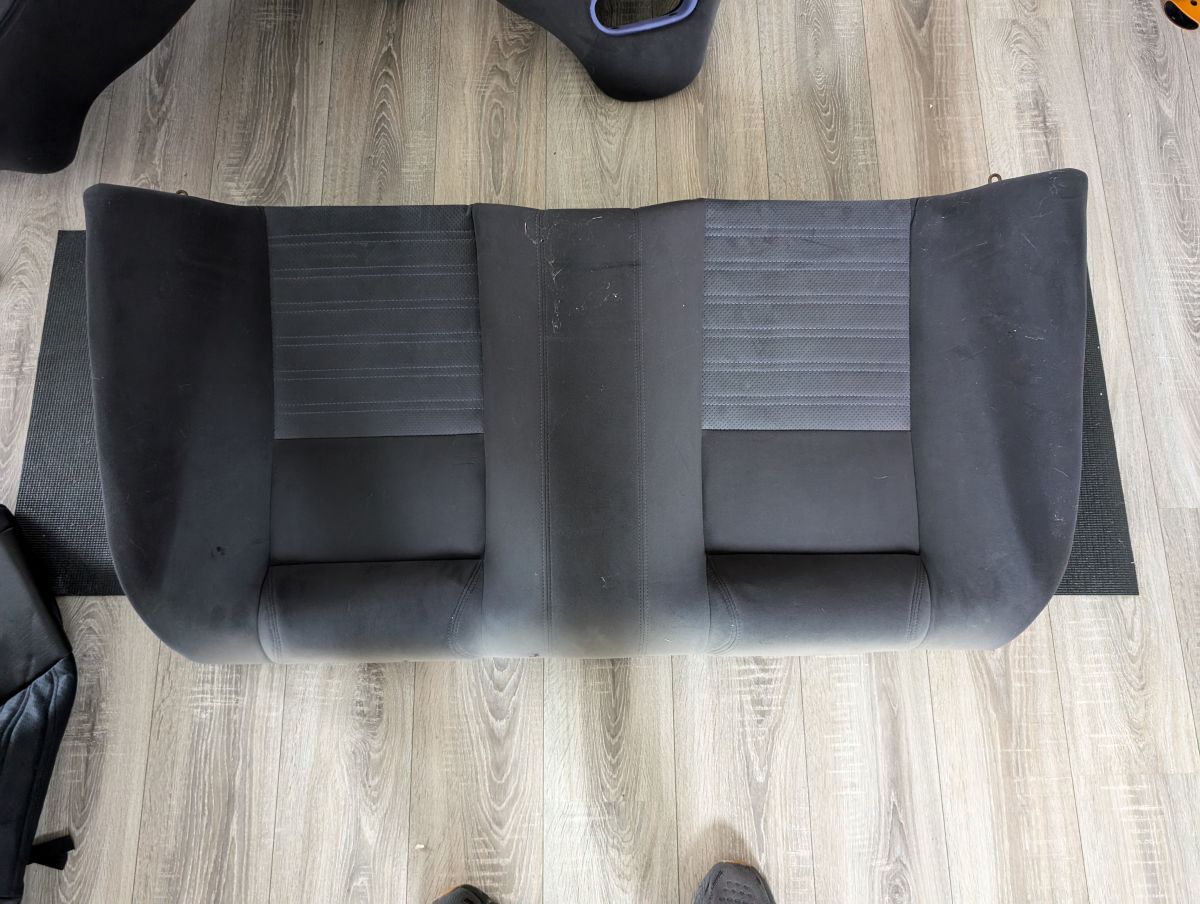
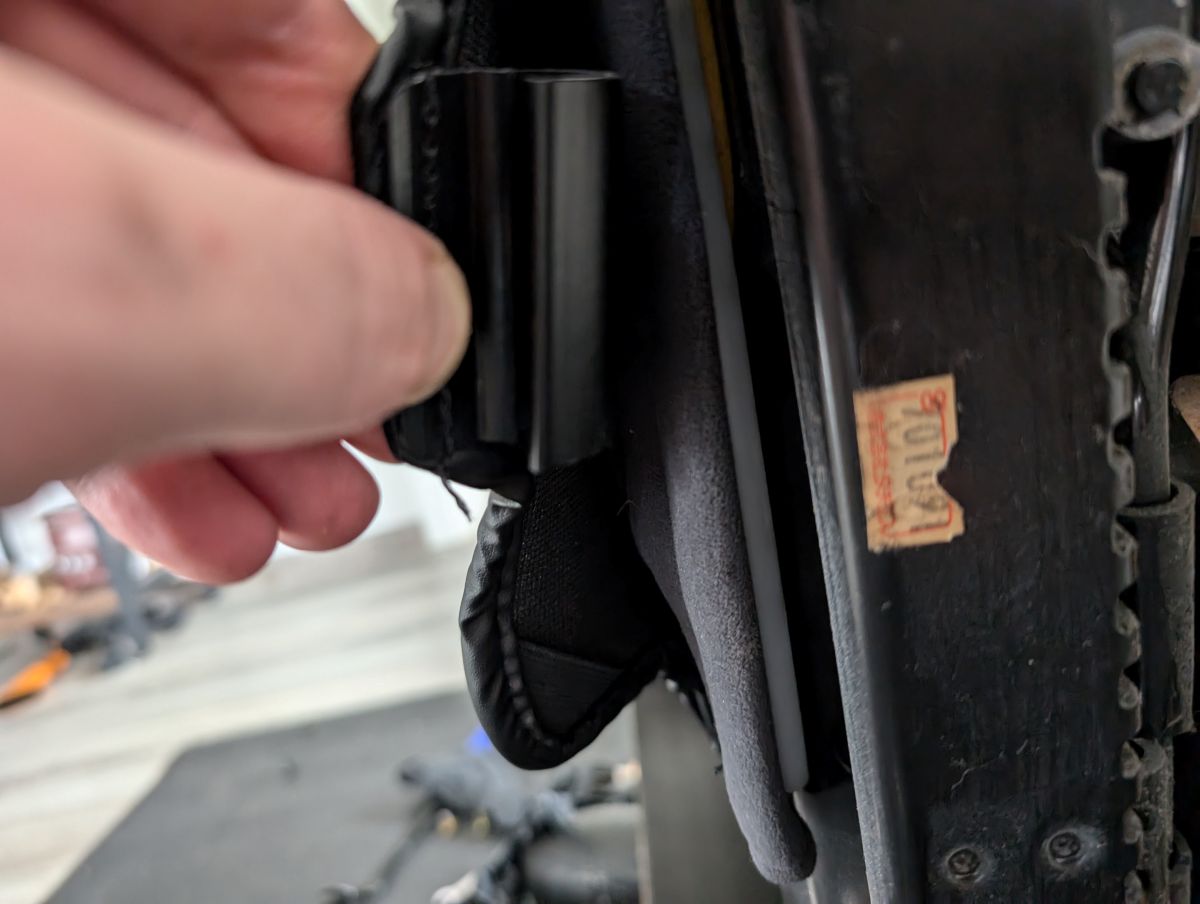
Flip it over and look for these two tabs that look like that have a tube of foam inside of them. You’ll need to force those tubes between the fabric and the cushioning. The joint provides enough pressure to keep them both secured.
Next secure the two small velcro tabs to the metal bar they line up adjacent to.

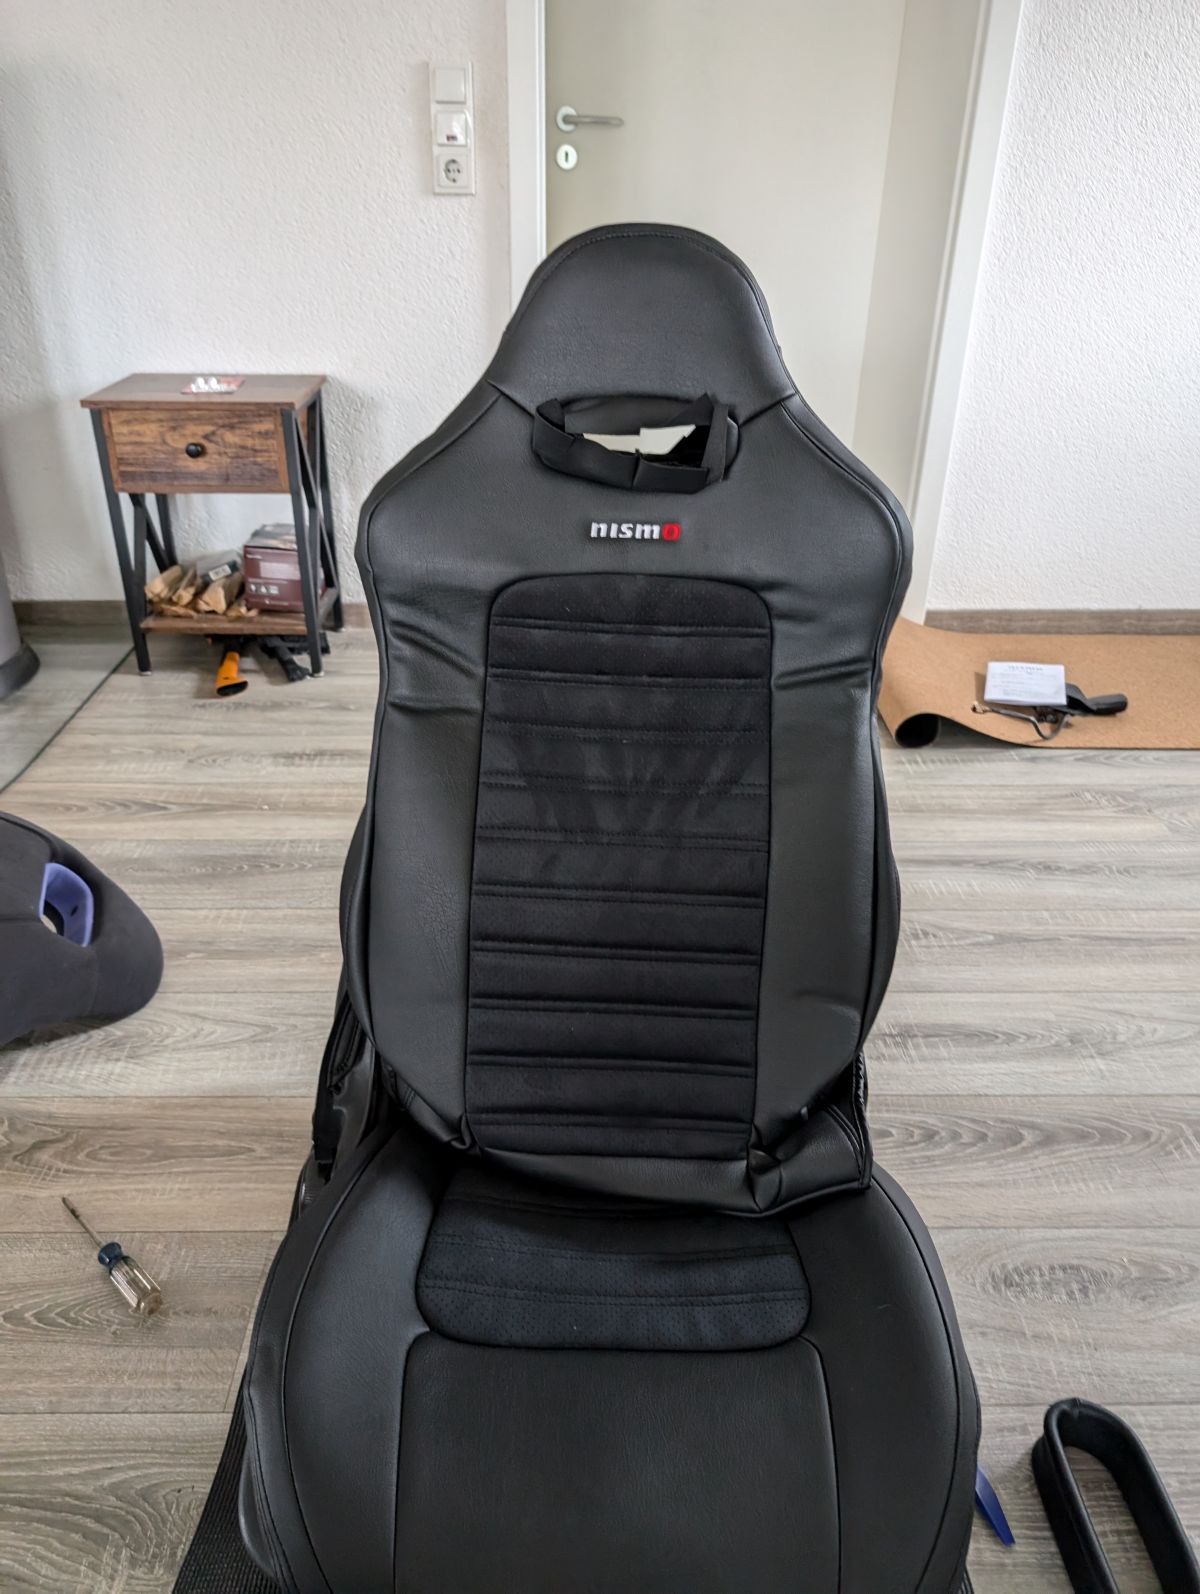
They should look like this when you are done. I think I should have played with the positions of head rest a little better, make sure yours are seated into the wrap a little better. I most likely will re-do this at some point.
They should look like this when you are done. I think I should have played with the positions of head rest a little better, make sure yours are seated into the wrap a little better. I most likely will re-do this at some point.
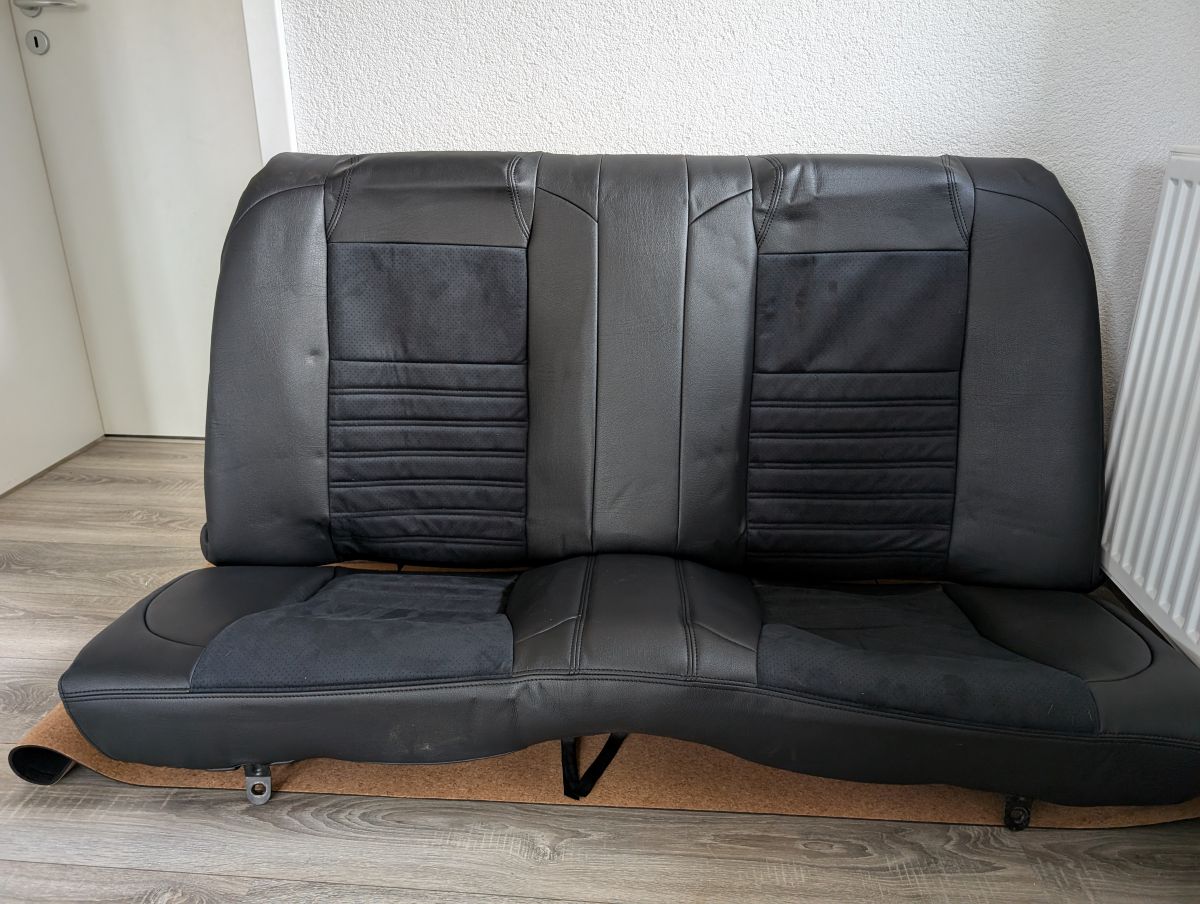
That’s it. If you removed the seats and fully wrapped your back seats without a break, then consider taking one now… the front seats are a pain in the ass.
Alright, on to the front seats. First we will start by removing the plastic trim around the edges. Remove these three phillip head screws circled in green.
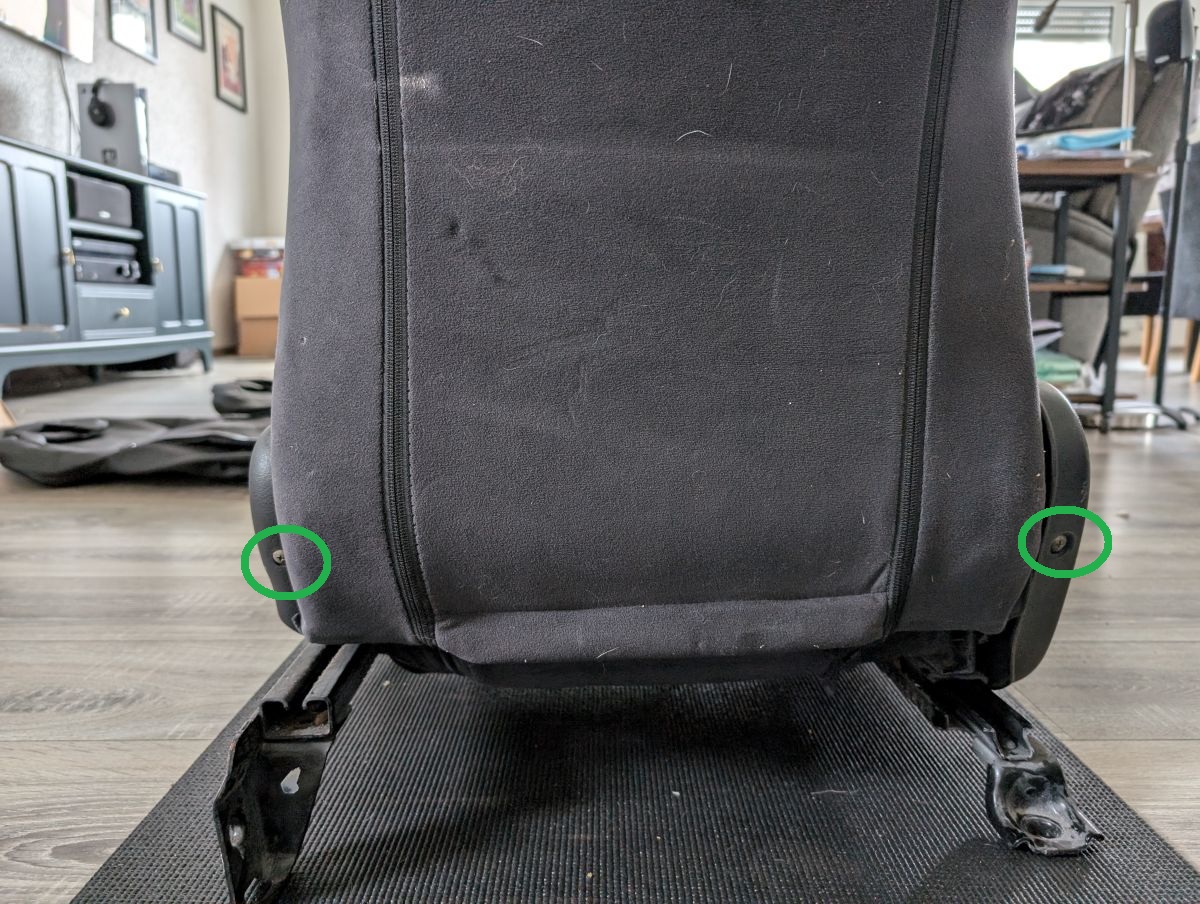
Then, remove these two in the back.
Grab a socket and remove the seat beat retaining bolt, I think It was a 10mm.

Then, use your trim removal tool to pop out this retaining clip.
Grab your seat cover and drape it over the seat you are working on.
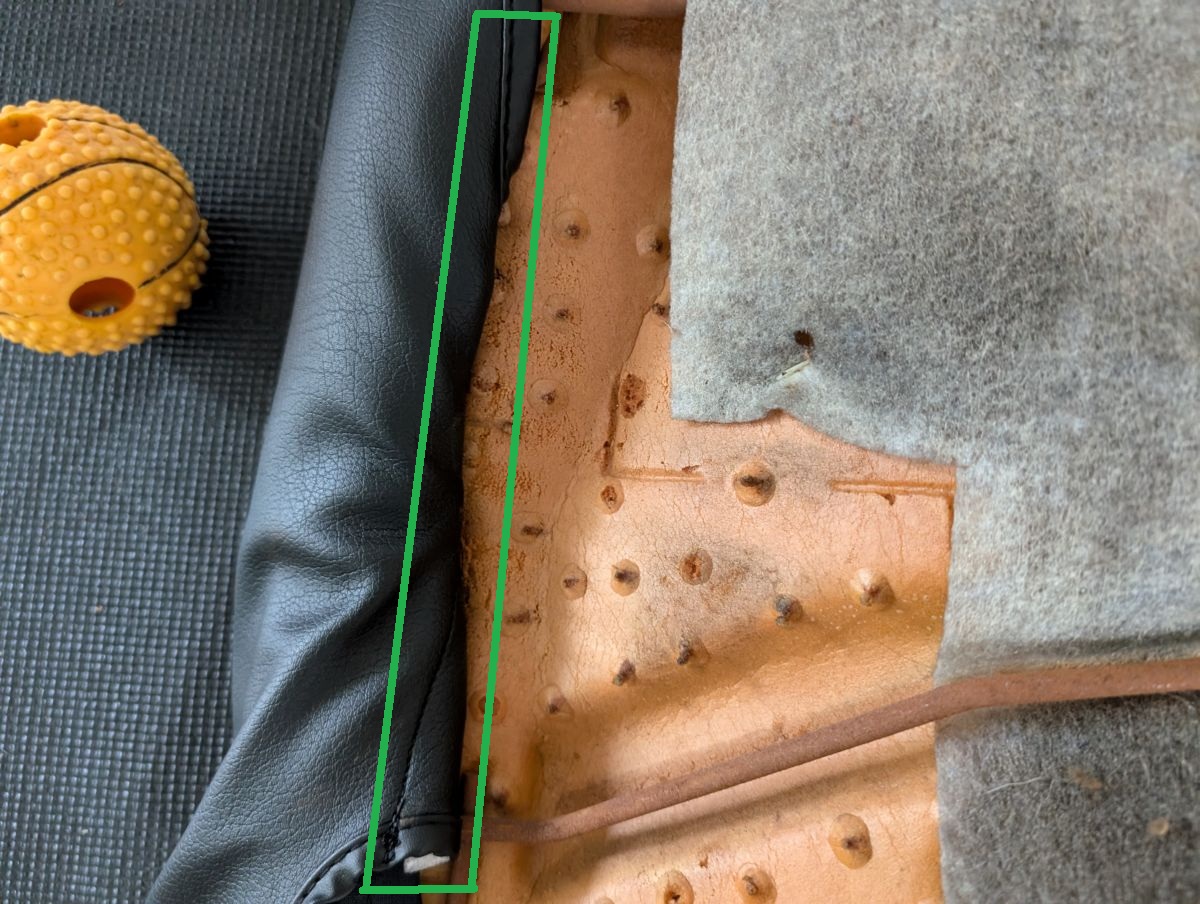
Flip it over so you can see the bottom and find this tab .
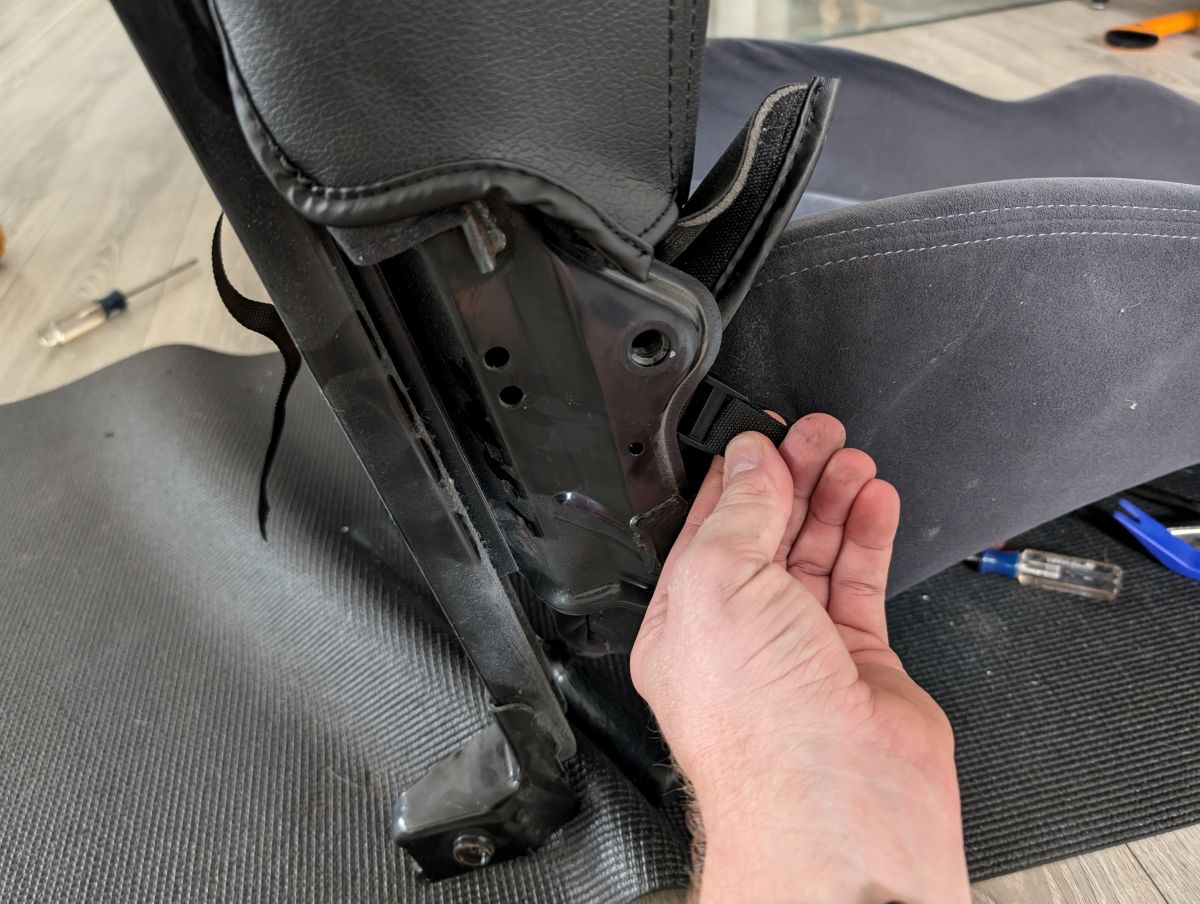
Pull this clip down/around into a crack between the old cover and the seat rail. The green box is a good example of what it should look like when you are done. You can also go ahead and secure the two longest straps that run from the front to the back.

For the one strap in the back, it is a little difficult to get the buckle in the right positon. Start by feeding the buckle behind the seat belt plate as shown in the picture.
You’ll want to get it out and pull it through the underside of your rail, some needle nose pliers will come in handy here.
When you feed the actual strap through form the other side, make sure a little part of the leather is visible.
Make sure nothing is twisted and pull the strap through the buckle.
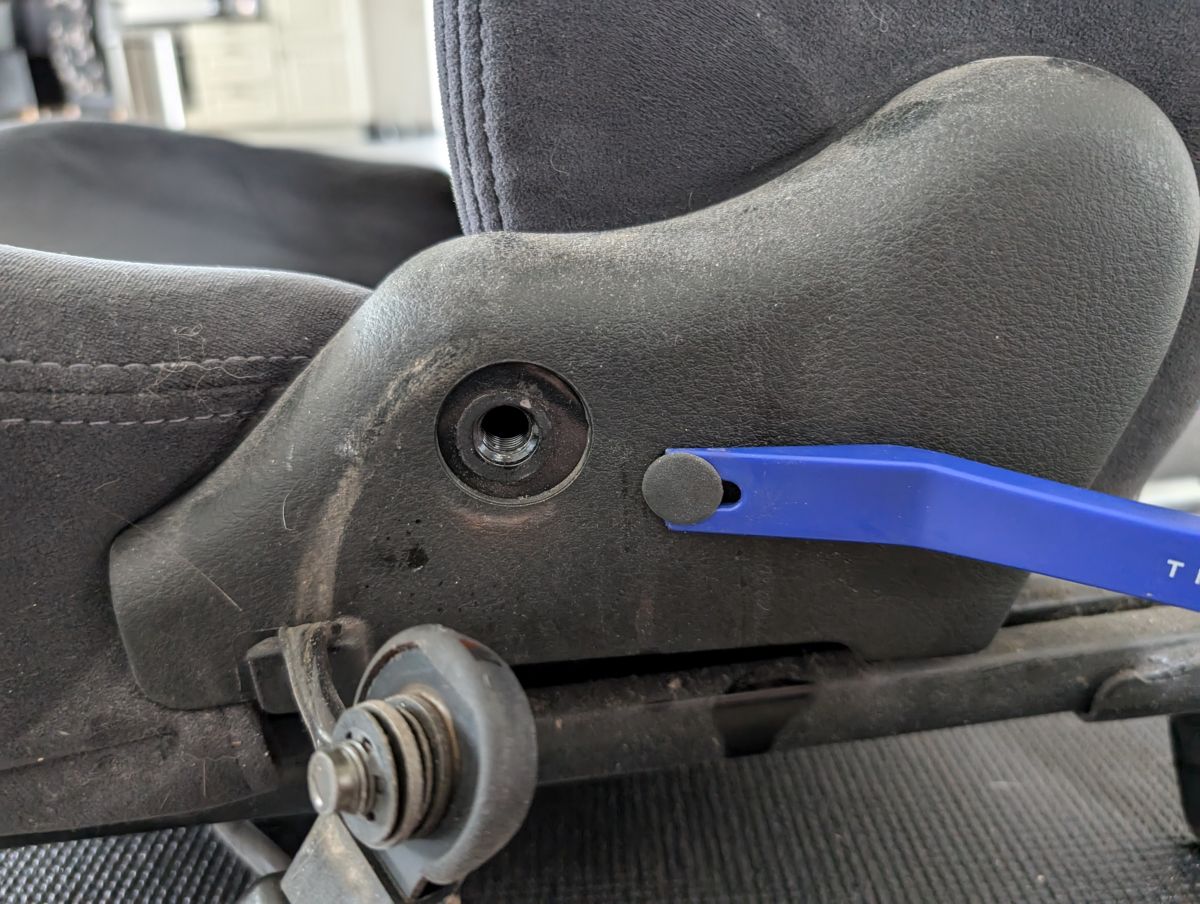
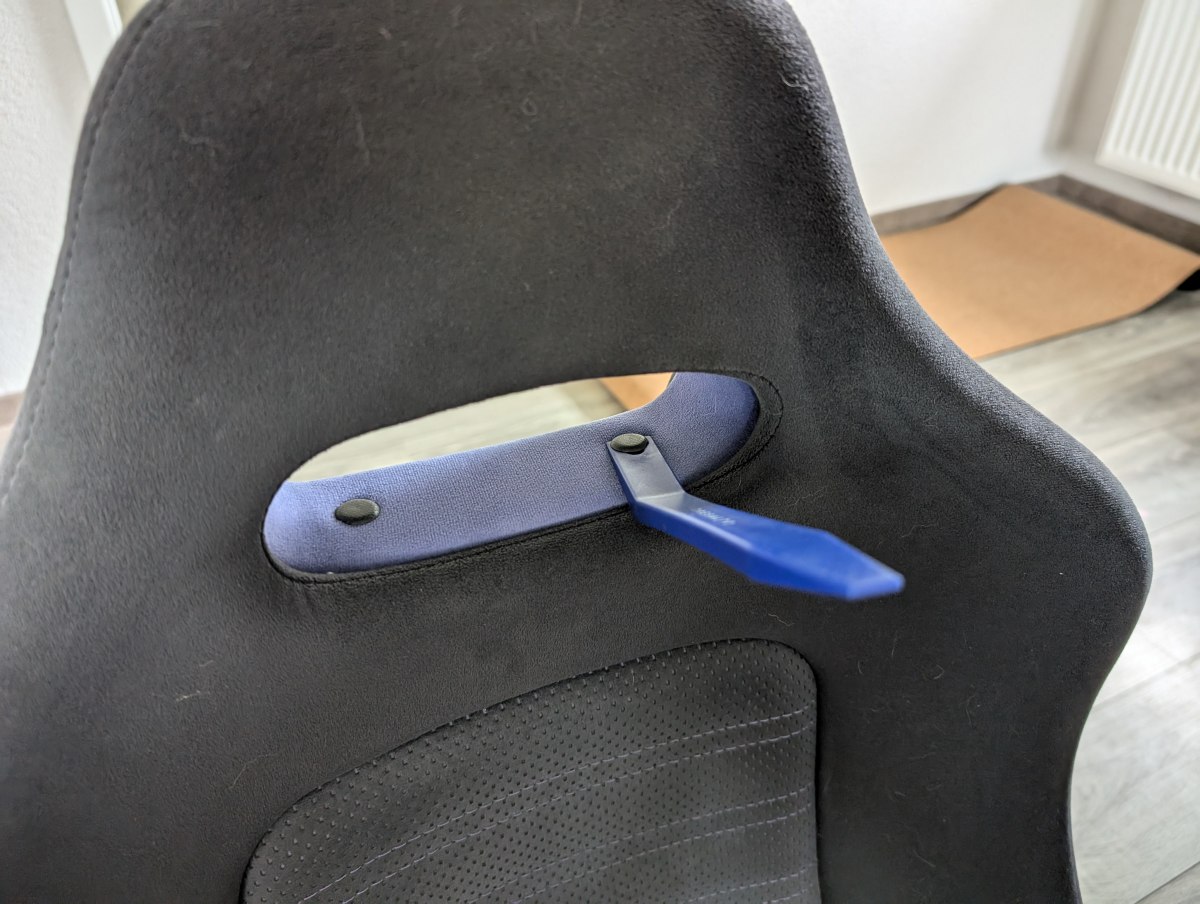
Now for the hardest part, getting the racing hardness port hole remove/installed.
Grab your trim removal tool and take out all four retaining clips.
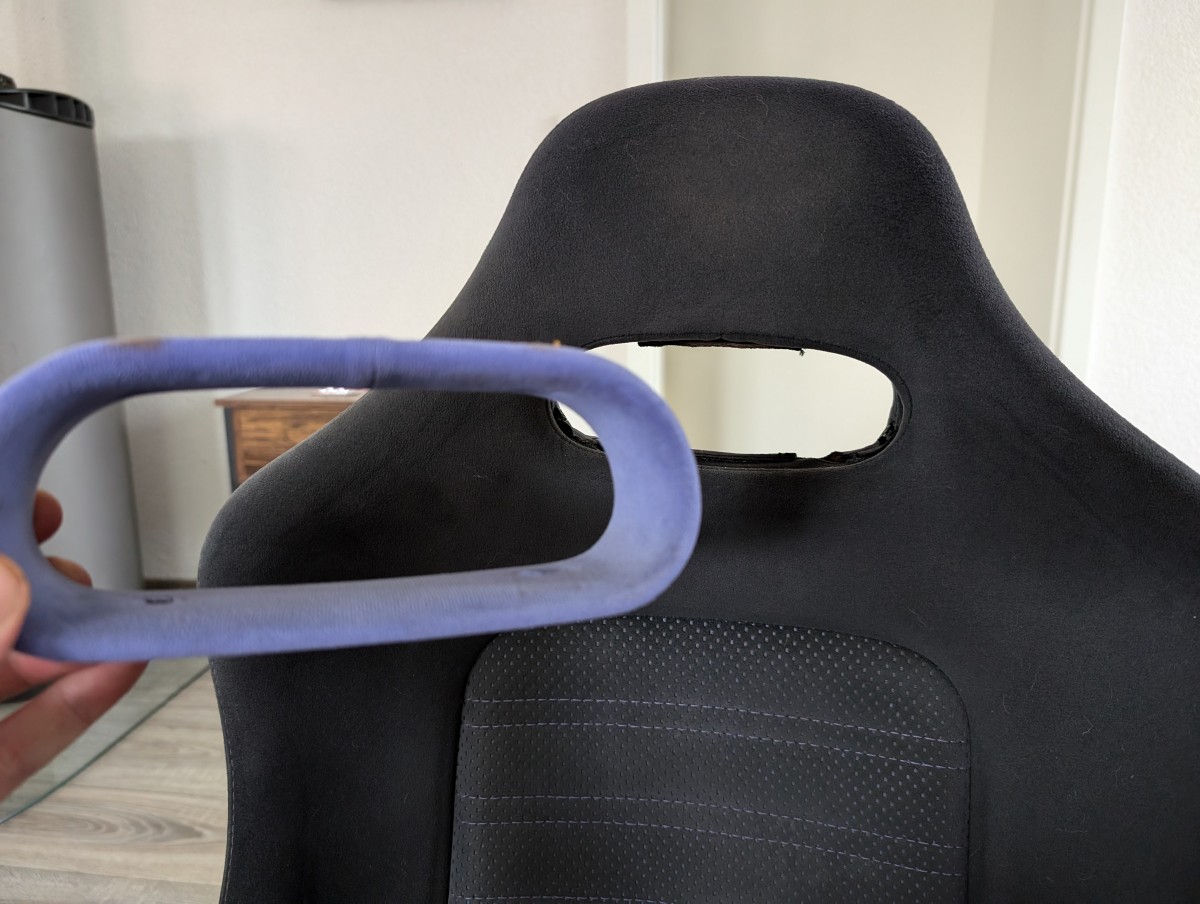
These things are very much embedded into the seat, you are going to have to wiggle them in/out and side to side. Just be patience and gentle, you don’t want to damage the seat. When they come out, you are going to want to remove the original colored fabric from the mount. I tried to install the leather over the original fabric, but there just isn’t enough room to work with.
The fabric is held in by factory staples, remove them with the metal trim tool. A flat head would work just fine too. Either way, be careful. You do not want to crack the plastic housing. If you can spring one side of the stable loose, you can use your needle nose to pull the other side out.
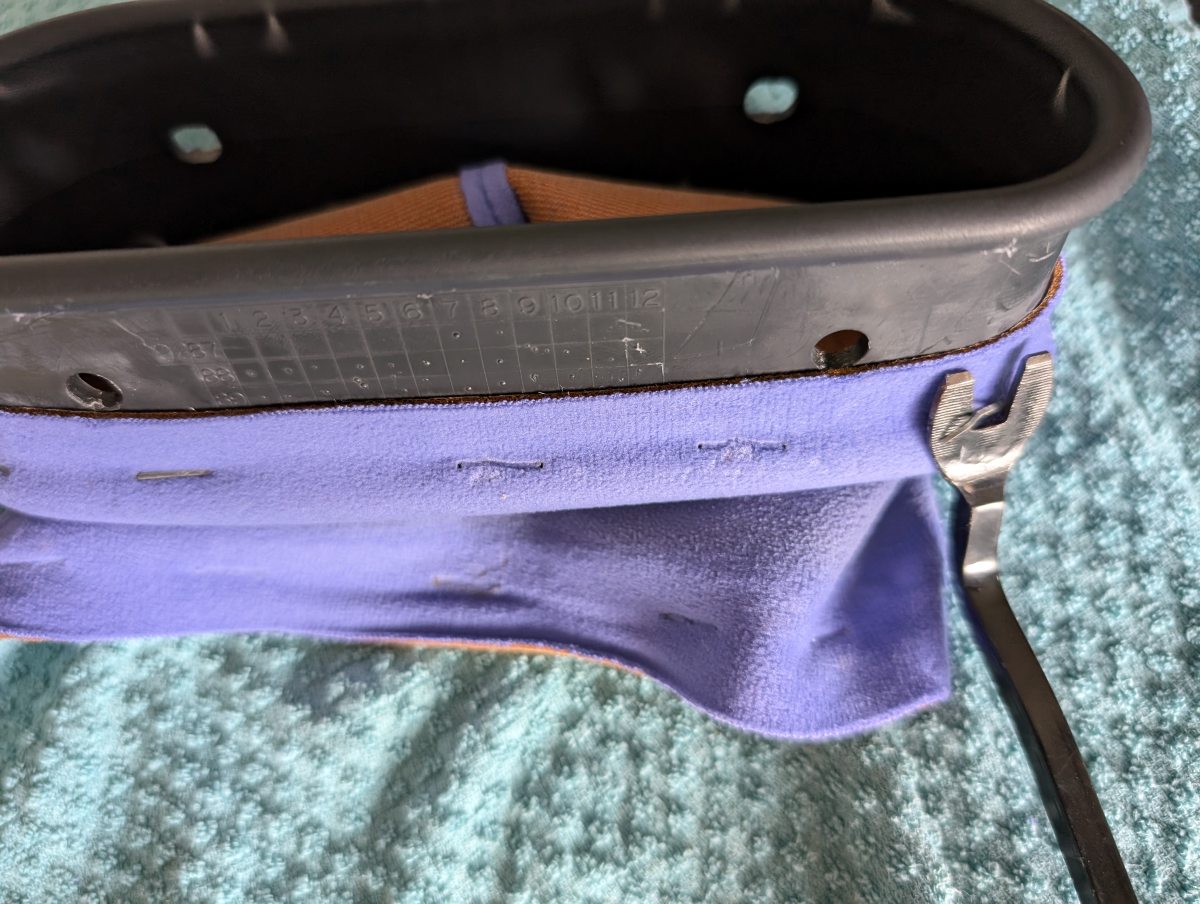
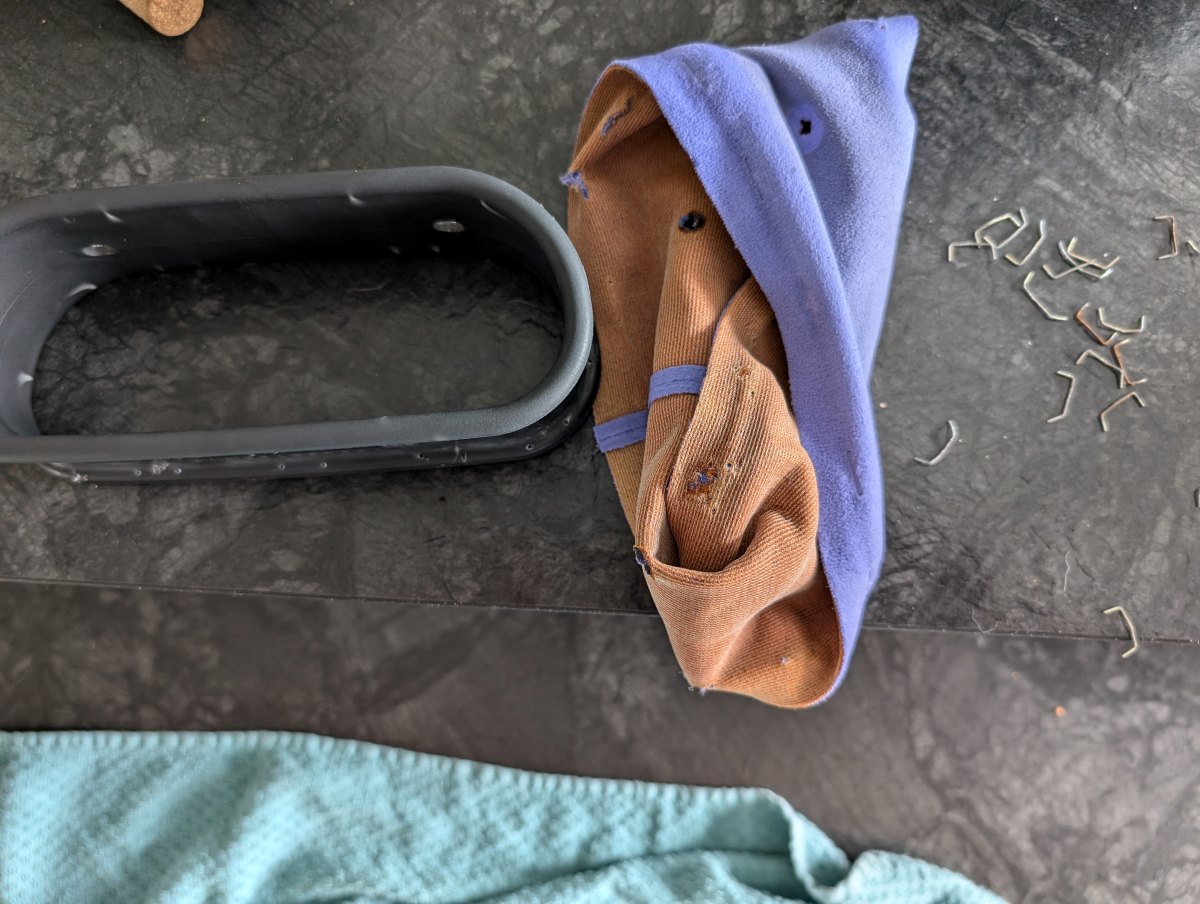
There are a lot of staples, so this will take some time.
Take the leather sleeves, pull them inside out and slip them through the inside of the mount.
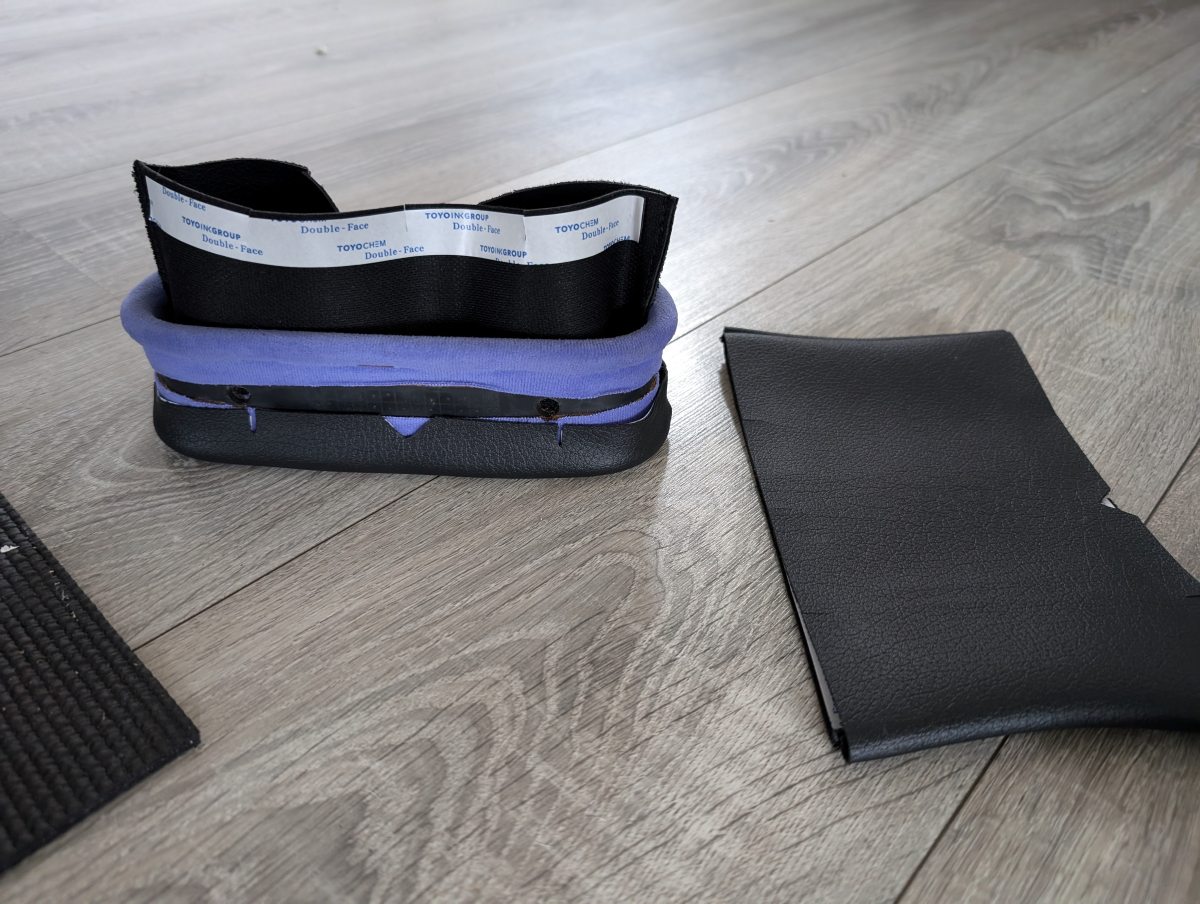
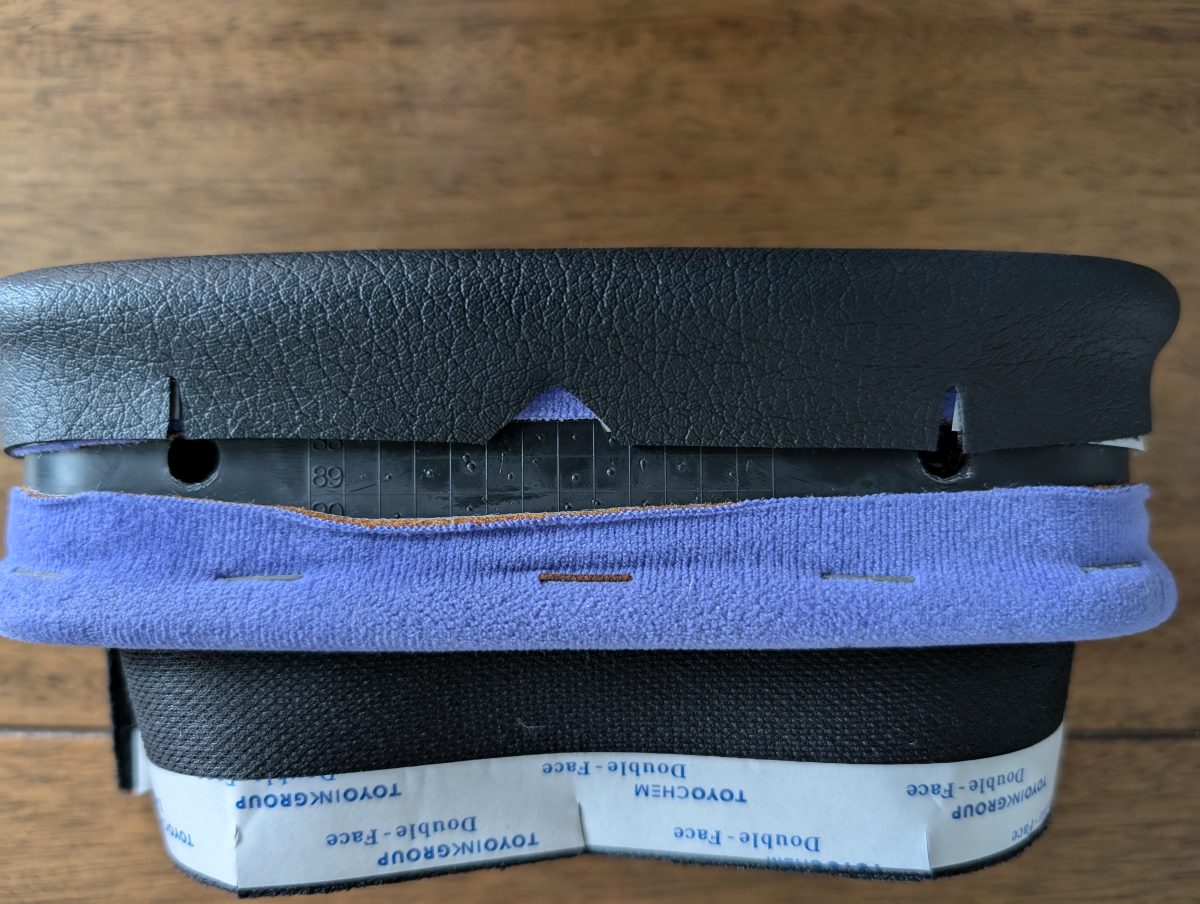
Disregard the colored fabric, this is an earlier picture taken before I decided to remove it. Remove the sheet protecting the adhesive strip and fold each side down evenly. It’s a good idea to examine the edges and make sure the edges look crisp before deciding to put the adhesive down. Make sure the slits in the leather line up with the holes in the housing.
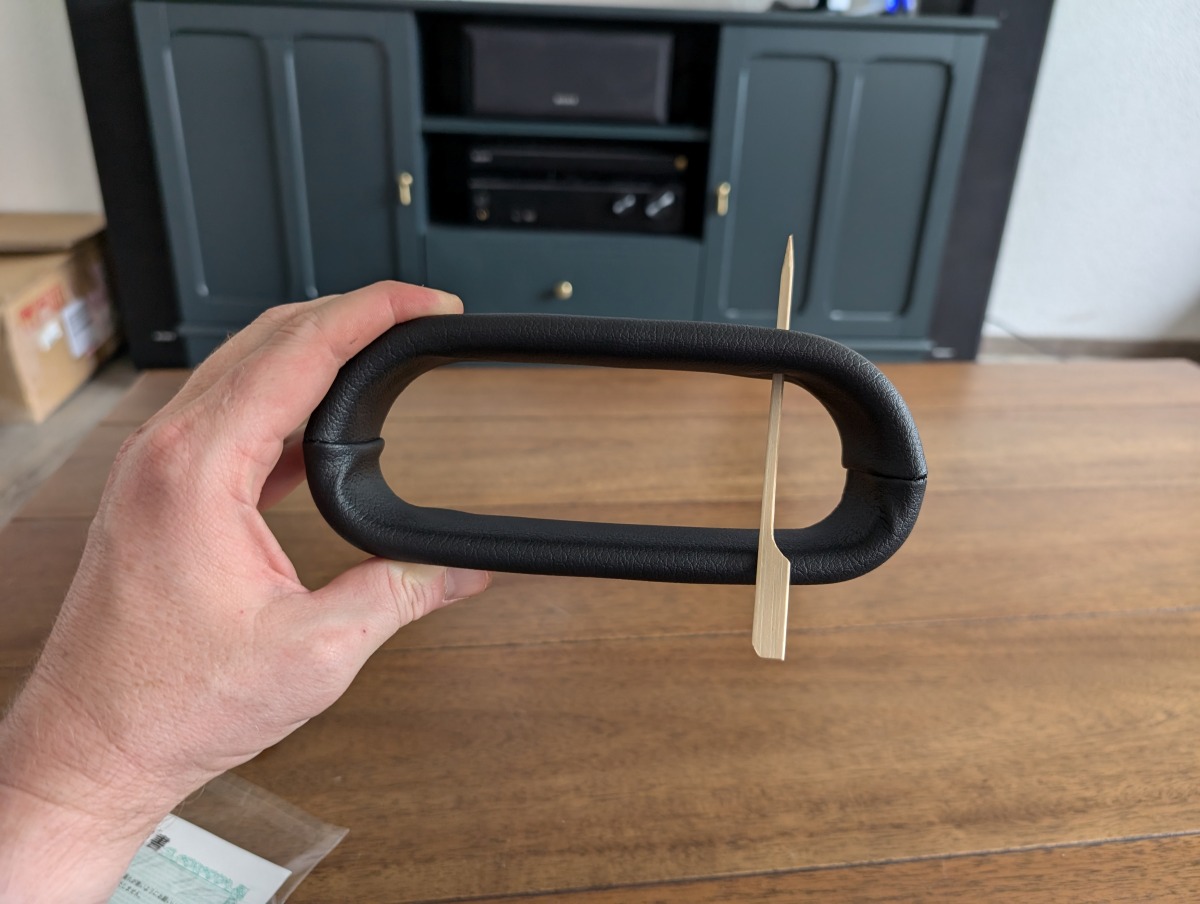
When you are examining the edges to make sure there are not weird folds, you can ignore where the seams are. I messed around with it for a good hour and couldn’t find a way to make it look unfolded/dented in the corners. Here is the part of no return, you are going to have to punch a hole through the fabric in order to but the retaining clips back in. I had some BBQ skewers laying around that were just the right size.
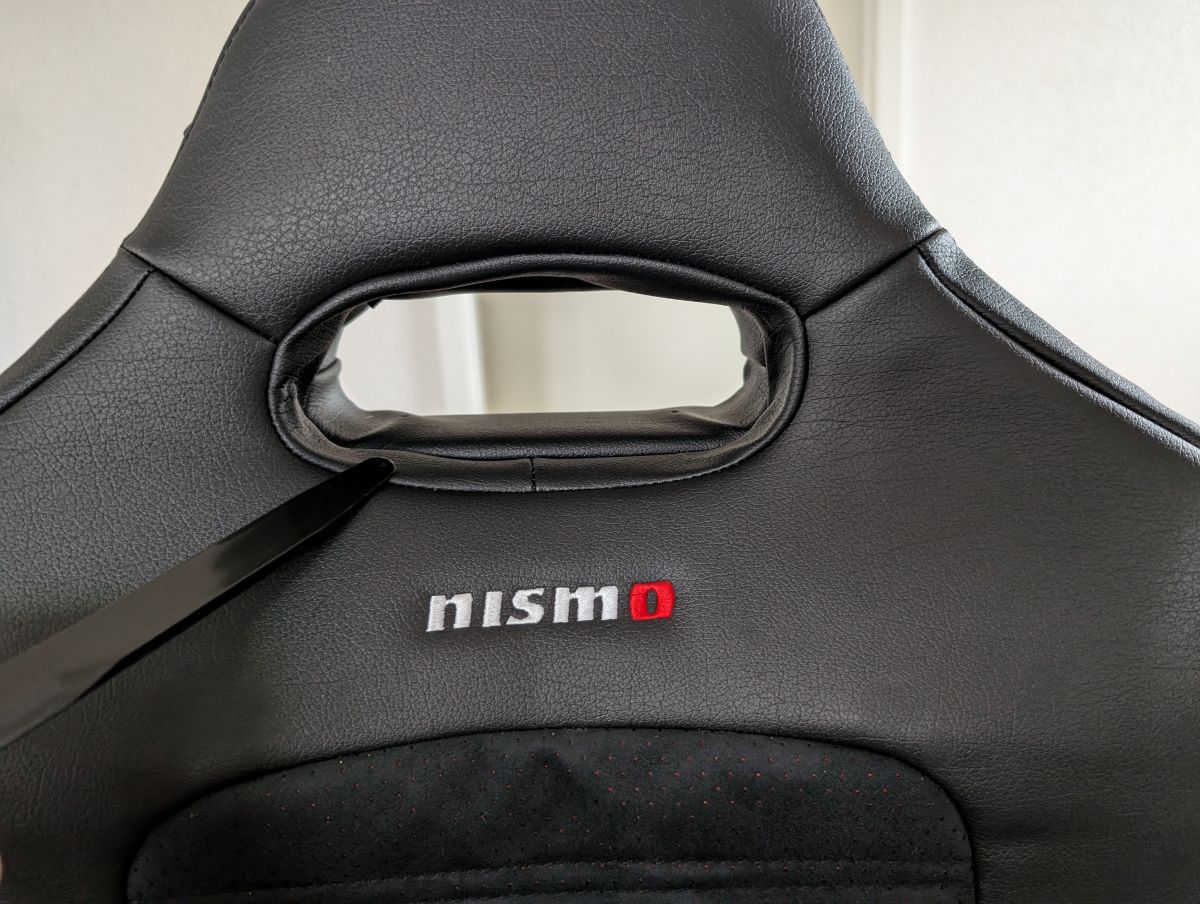
This is the part where you are going to be cursing to the walls for a while. You remember that black plastic trim tool that came with your seat covers? You are going to need it to tuck the fabric around the seat hole under the trim piece. I suggest inserting the trim piece from the front of the seat and guide the hanging fabric in with the trim tool as you wiggle it into place. You’ll have to get the back excess fabric to tuck in from the reverse direction and it’s a pain.
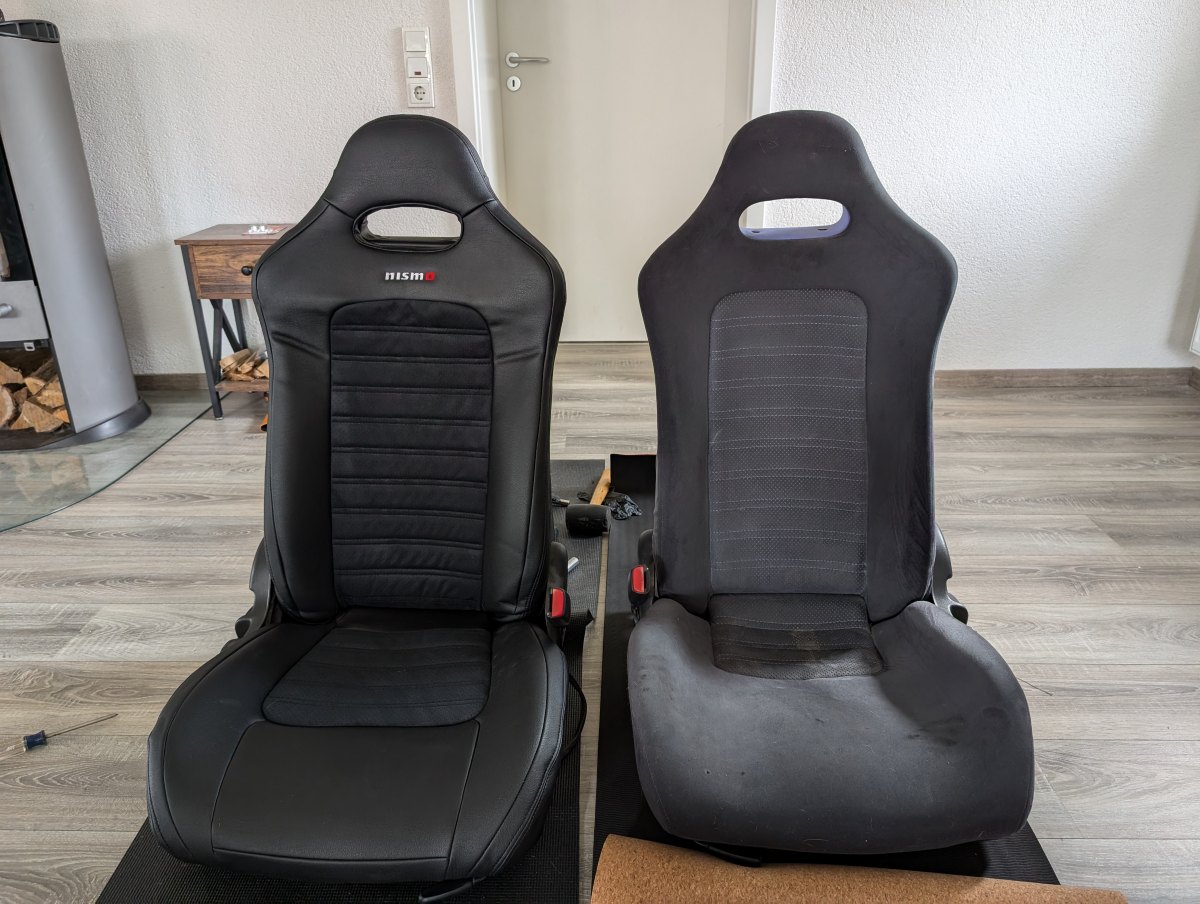
Put the four plastic retaining pins back into the housing and you are done. Here are the two side by side, they really do make a huge difference. Now all you have to do is rinse and repeat for the passenger seat and reinstall everything back in the car…. Starting with the back seats first, obviously.